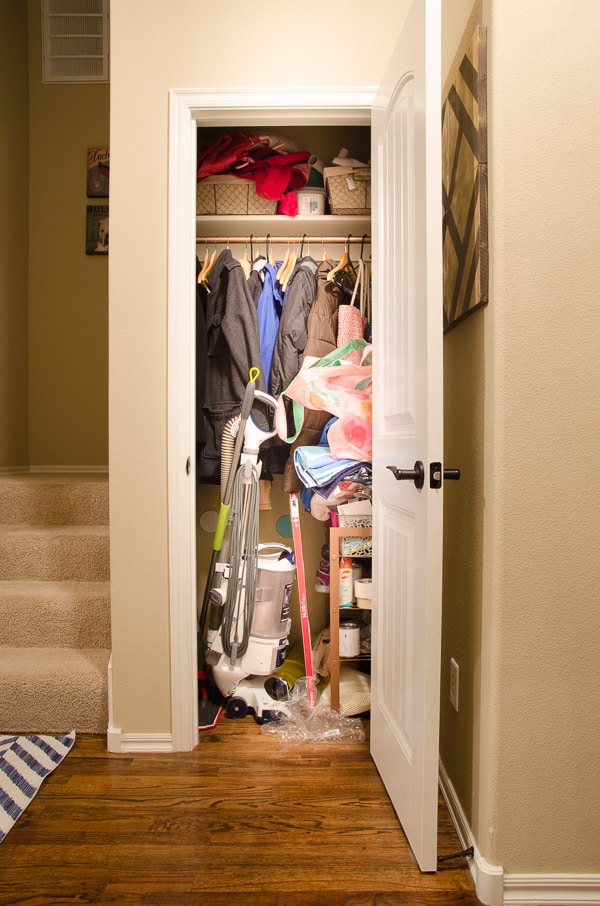
We have a small coat closet in our entry that I’ve been itching to transform for years. It’s been a combo coat & front hall closet, with the catch-all part getting more out of control by the day.
Seriously, look at this mess!
With the addition of the coat rack in the main entry last fall and some coat hooks in the garage entry, we eliminated the need for coat storage in this closet. It still housed coats we never wore, but those were ready for donation.
We did need ONE place to store all the cleaning equipment and maintenance supplies and this hall closet was ripe for organization.
Before this project, we had cleaning/maintenance stuff spread out to SEVEN different spots. Such a waste of time when you’re looking for something.
I started by making a list of everything I wanted to move to the new closet, along with the current location.
Office Bookshelves – Tool Bag
Office Open Shelving – Tape Measures
Office Closet – Command Strips/Hooks
Garage – Screw, Anchors, Steam Machine
Laundry Room – Cleaning Supplies/Tools, Lightbulbs
Coat Closet – Vacuum, Mop, Air Filters, Random Hardware
Kitchen Drawers & Office – Product Manuals & Warranty Info
In one rainy Saturday, we installed some quick DIY shelves to create a dreamy one-stop shop!
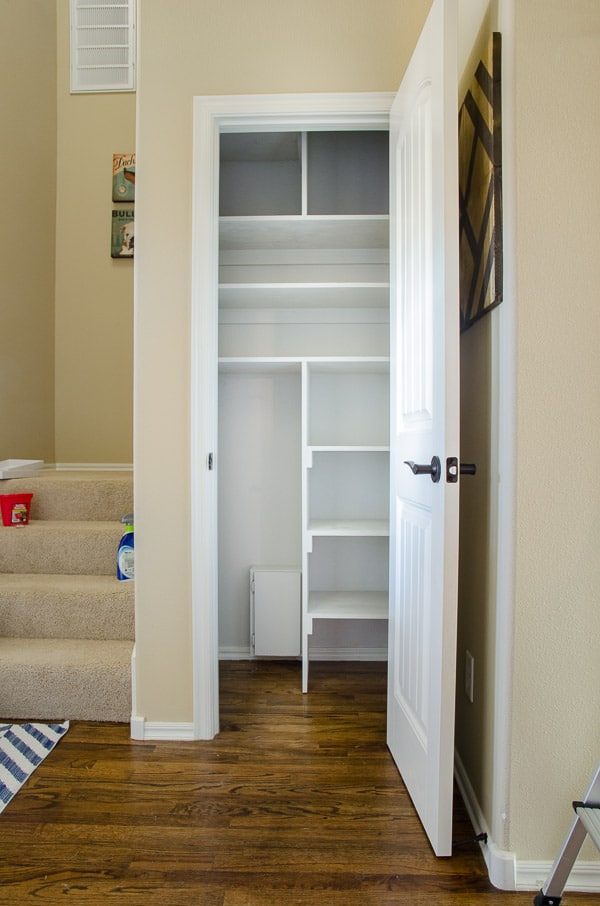
Since everyone’s available space is different, I’m not going to talk much about the details of the shelf installation. We just used 1×2’s as braces and then 16″ wide lumber for the shelves.
You could easily use pre-made shelves or a kit, the key is just finding somewhere to gather all your interior cleaning/home improvement supplies into one spot.
Here’s what our coat closet looked like once we got the new shelves installed and painted everything very light gray. I used leftover paint from my office. Budget win #1!
Organized Cleaning Closet
Based on the list of things I wanted to move to this “new” closet, I knew I needed several new bins to corral like items together.
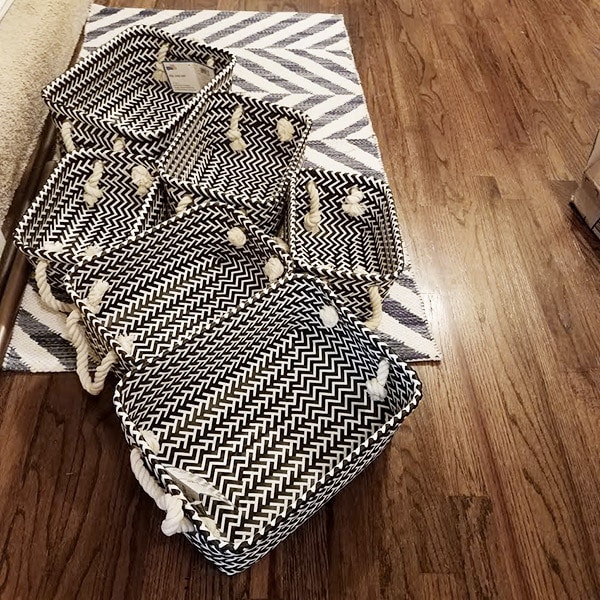
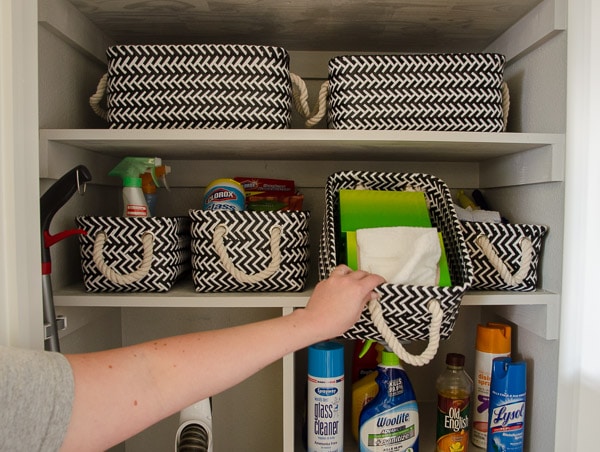
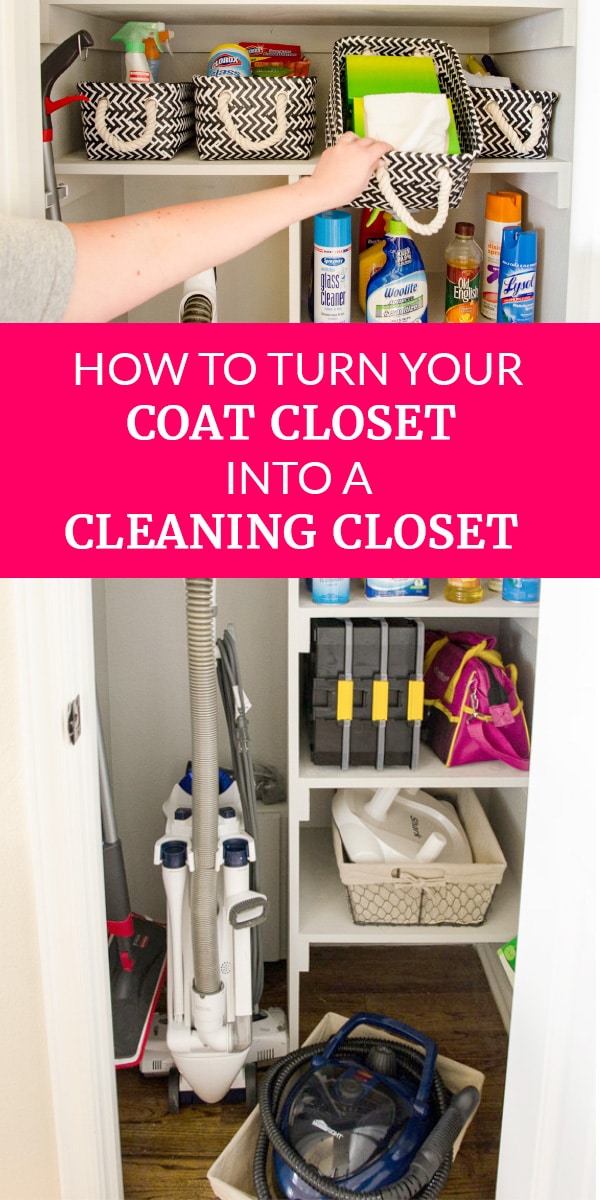
I found some geometric black and white baskets which was perfect because you know how strongly I believe that a pretty organized space STAYS organized much longer.
It can be hard to find more modern baskets, so when I see designs I love, I jump on them! It seems like they are no longer available, but this option is also cool!
While I was placing the basket order, I checked out some of the other organizing items and found two more perfect products.
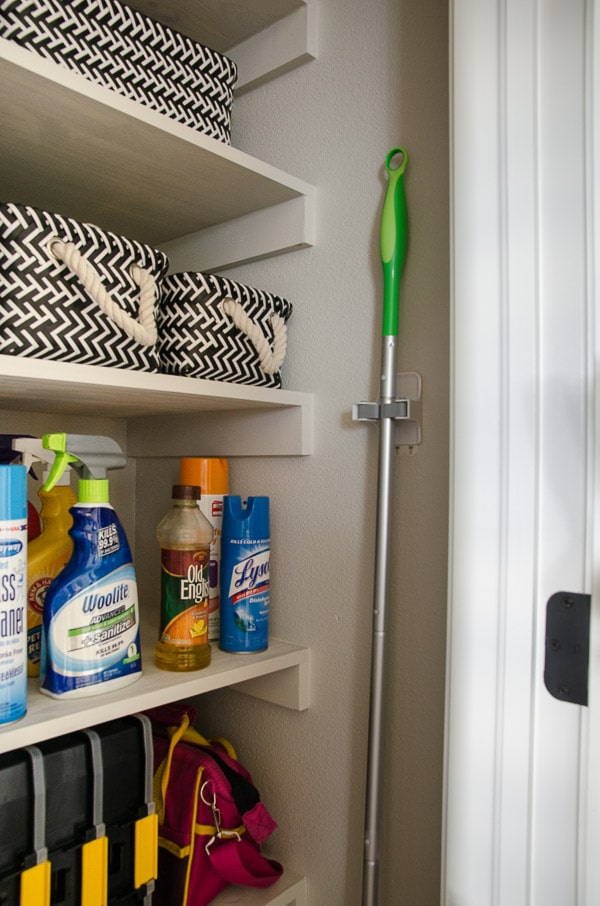
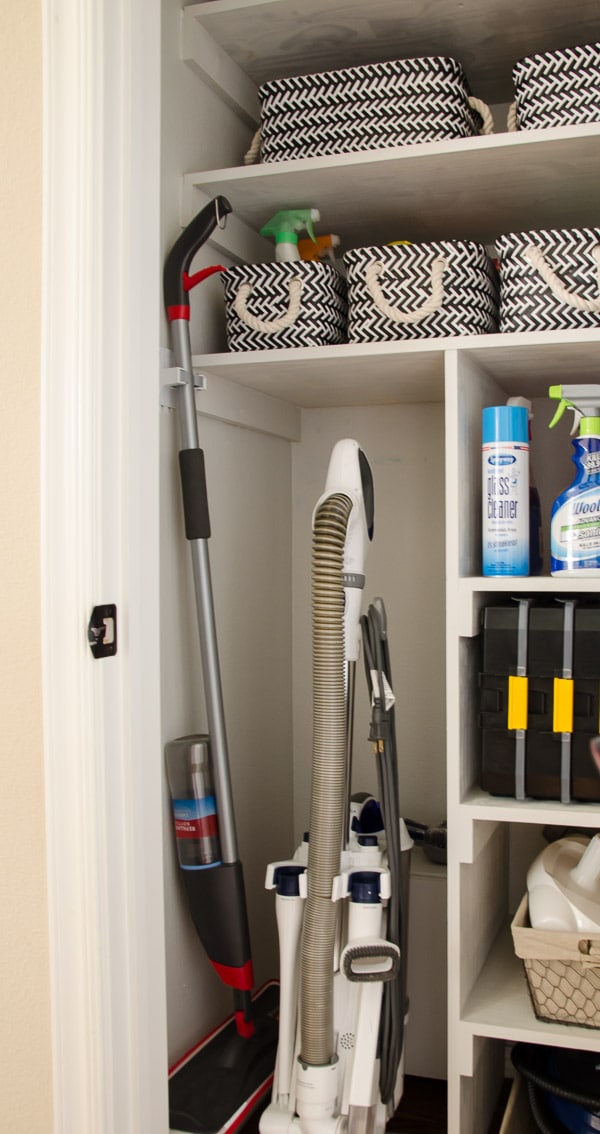
Did you know Command makes a broom holder? It’s brilliant!
You can instantly have a broom hung on any surface with no damage/holes. I bought them to hang on the inside of the closet door, but ended up having enough space to tuck them on the closet walls.
I did go through all our long-handled cleaning tools and weed out the ones we never use. I can’t tell you the last time I’ve used a traditional broom inside the house, so it was kicked to the garage while other random mops went to a garage sale pile.
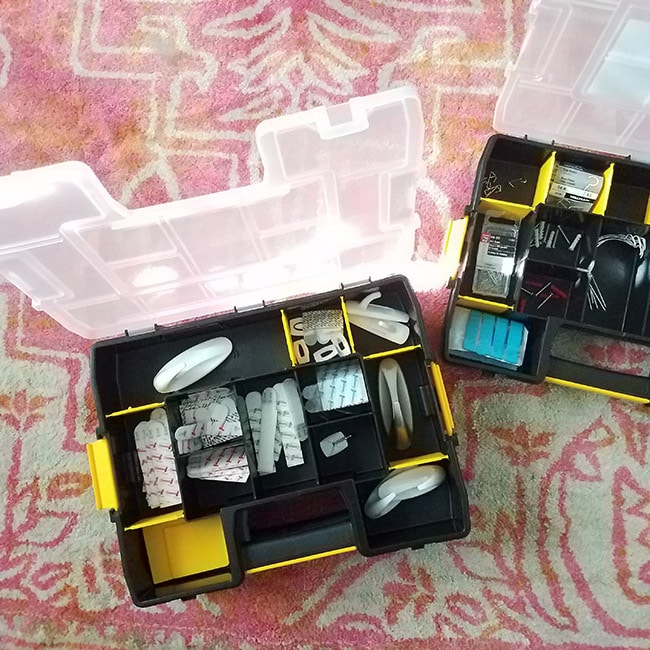
The other new-to-me item is the perfect adjustable organizer for small hardware, anchors, hooks etc.
The individual organizers even connect together so you can store them neatly. Having all these items organized and in the house makes me wonder why they were ever in the garage!
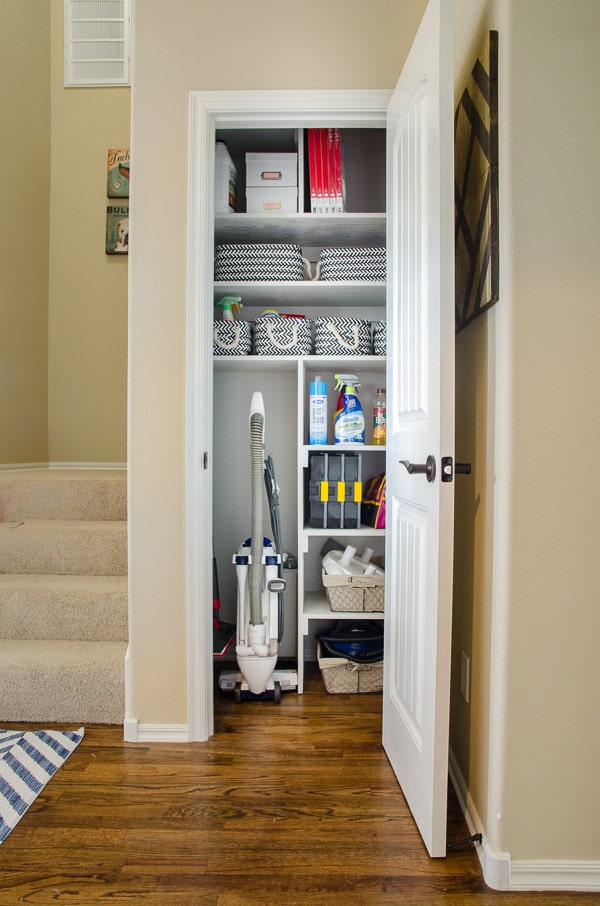
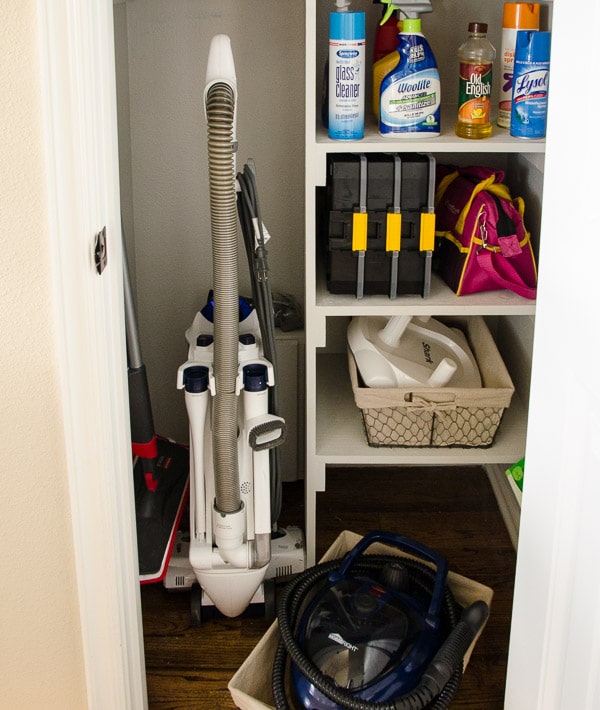
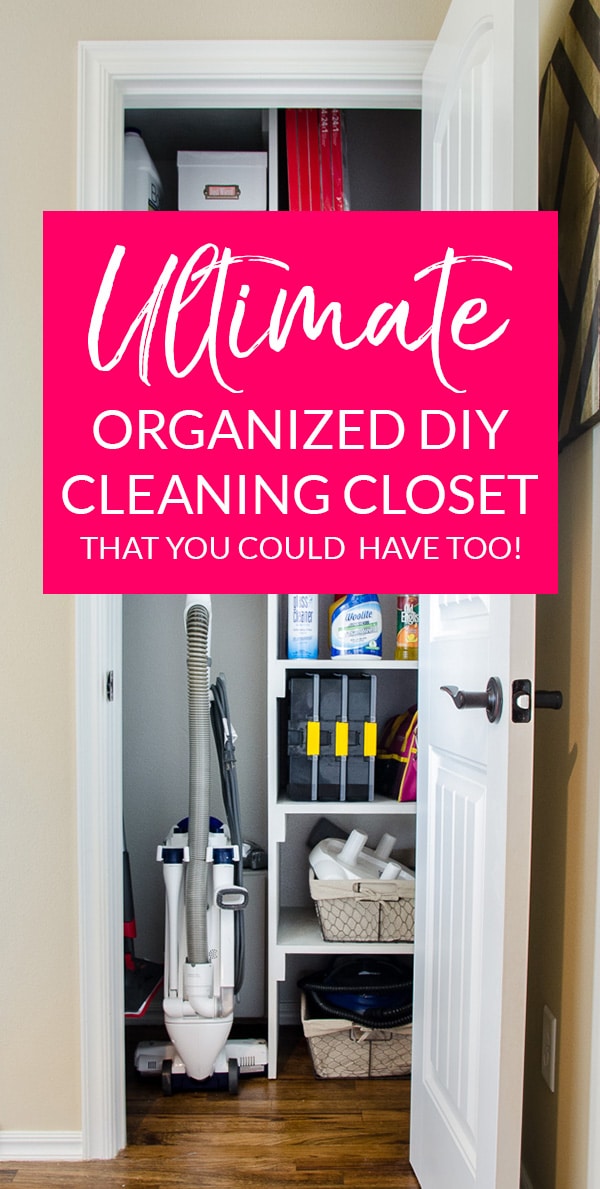
Here’s the full view of the ‘new’ closet.
Much better, right!?!
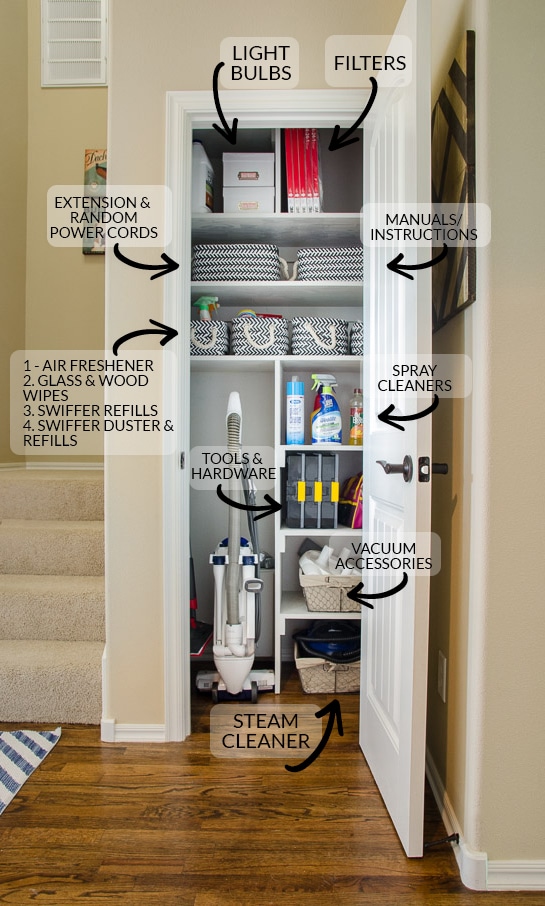
Here’s the legend of everything we fit into this small space.
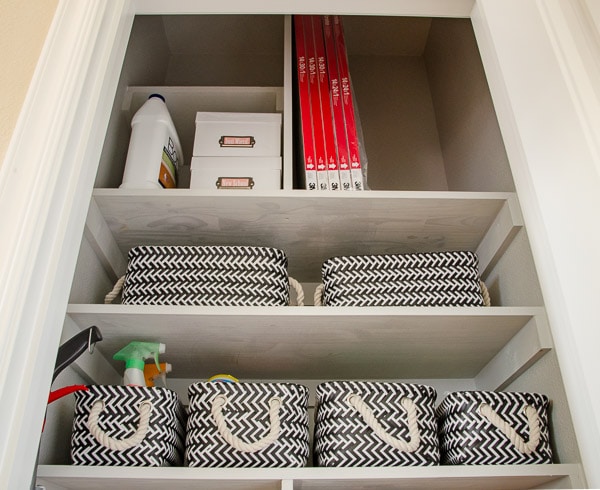
The closet is pretty tall, which gave us space to accommodate the full height of the 30″ air filters without taking up prime space.
On the left side, we added an extra shelf that will require the step-stool to reach, but is perfect for infrequently used items.
We don’t have any extra bulbs for the recessed lights right now, but those will go up top. The white photo boxes hold our regular light bulbs.
My goal is to do a quick Swiffering of the wood floors each day to keep the Maddie hair under control.
It’s going to be SO much easier now that all the supplies are easy to access.
Before, I risked an avalanche in the laundry room cabinet every time I tried to grab one of them. Which meant most days I didn’t bother, causing the hair to build up and make me CRAZY.
This closet isn’t about an obsession with a constantly perfect home. It’s about making things as easy as possible to keep a relatively clean house, which makes me happier and less stressed than a mess.
Speaking of a mess, I’m constantly considering cleaning things with our steamer, but it’s always been out in the garage on a high shelf. Not exactly a spot that inspires frequent use.
Now it’s in one of our old baskets tucked at the bottom the closet. So much better!
I can’t get over the fact that we condensed items from SEVEN different locations in our home to this one small closet.
I’m giddy at the thought of newly open shelf space in the laundry room AND office. On top of that, the relief I feel from not having to fight never-worn jackets to get to the vacuum is pretty extreme.
May 2018 Update:
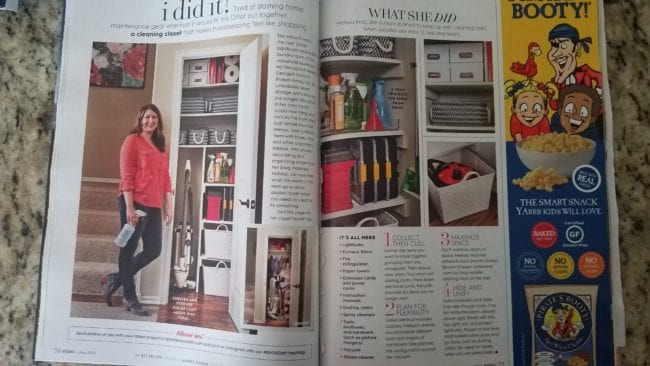
When I did this project, I never could have guessed it would have ended with Better Homes & Gardens coming to my house for a photo shoot! The closet and I were lucky enough to appear in the June 2018 issue!
With all the fabulous mudrooms, coat racks, and coat stands available, I’m convinced everyone with coats in prime closet space should consider stealing the closet back to create a home maintenance command center with all the supplies your family uses.
Anything that makes day-to-day life this much easier should be in every house!



Emily says
I definitely need to do this with my cleaning supplies closet! The shelves are so old they’re starting to bend under he weight of everything. Looks great!
Nicole Patterson says
This closet looks AMAZING Melissa !!!!
Deb says
Beautiful. This looks perfect. You did a great job on this project.
Melissa George says
Thank you so much!
Becky says
How did you attach the cleats to the vertical board? Glue? Bolts? Super short screw?
Melissa George says
Hi Becky – Do you mean the main vertical board in the middle? We used both Liquid Nails adhesive and then screws going in from the vacuum side of the wood board through to the shelf cleats on the other side. It’s been a couple years now, but I think we also screwed down into that piece from the shelf that spans across the top of it to help tie everything together.
Angela, Blue i Style says
Organization makes me so happy, and knowing that you were able to consolidate items from SEVEN spots in the house makes me darn right giddy! What a great solution! I need to head to True Value to find some Command broom hooks and those black and yellow interlocking organizers!
Melissa George says
Today I realized that those broom hooks will also work really well for flashlights, so you better grab some extras!
Ruby Soria says
Where did you purchase the shelves?
Melissa George says
Hi Ruby, the darn closet was a strange size – just under 3 ft wide, so none of the 3 ft closet systems would fit. We just built the shelves from raw lumber ourselves. True Value has the nice Rubbermaid systems on their website, or I think Container Store will custom cut their systems if you don’t have a saw and nail gun to make your own and also have an abnormal closet size. 🙂
Evelyn B says
What a great idea!! Looks great and everything is in it’s place. I didn’t have a coat closet built in my house due to non use with coats so I don’t have such a place to re-do but I do like your idea!
Melissa George says
I’d be so lost without extra closets to stash things in. 🙂 I’m more obsessed with the size of closets over bathrooms or even bedrooms. It all started with our first, inexpensive 1100 sq ft house that somehow still had walk-in closets. We didn’t really need them then, but I loved them anyways. I really should get over that and be comfortable having fewer things to put away in closets! Life would be boring if we didn’t have things about ourselves to improve though, right?
Amanda @ The Modern Nest says
This is a brilliant idea! We live in a condo and we are always stashing our broom, mop, etc in the utility closet on our balcony…not particularly ideal. I’ve always felt that our coat closet was underutilized so maybe following your example will give us a way to avoid going outside every time we need to break out the broom. Thanks for the inspiration!
Tara says
I love this closet! I’m working on simple shelving to replace builder grade wire shelving in my pantry (just bought the wood today!), and I have another deeper mixed-use pantry/closet in which I’d like to do something like this. Would you be willing to share the design for the vacuum compartment? It looks like you built shelves the same way I am (common board shelves with firring strips as supports); did you just connect an appropriately sized plywood or drywall to divide the sections vertically? Thank you!!!
Melissa George says
Hi Tara, For both the shelves and the vertical supports, we used the same 1/2″ x 16″ x 8 ft pieces of lumber with 1/2″ x 2″ strips (actual size) for the supports. To do the vertical section, we started with the piece that goes the full width and forms the “top” of the vacuum section. Then we cut the vertical section to be a tight fit and nailed through the shelf directly down into the top of the vertical section. After that, we added all the shelves to the right of the vacuum compartment both for storage and to support the vertical piece. We opted not to secure it to the floor because it feels totally solid as is. However, there is a water pressure valve box that the vertical piece sits against on the vacuum side, and that adds a little bonus stability. I think it would still work without that box, but you could do a support strip on the wall vertically next to the vertical divider to make sure it can’t shift to the left. I would do that last though, it’s nice to have a little play in the piece as you are installing the other shelves. Hope that helps! It’s AMAZING to have the spot for the vacuum and not have to fight through coats to get it.
Amanda says
Hi do you mind my asking how much this cost? I love it! thanks!
Melissa George says
Hi Amanda, We did all the labor ourselves and already had some of the wood and the white paint so the cost was minimal. Materials for the shelving would probably be $50-$75 if you needed all the wood, paint, and caulking. Putting up shelves like this is a great DIY project!
Tara says
Thank you so much for your reply! Preparing for Thanksgiving week off, and I’ve finally gotten back around to my deep pantry and am designing it this weekend. Your response was super helpful and works out given that I want my new shelves to be 16 inches deep (so using the same board for vertical support and shelves would be ideal). However, our local Home Depot only sells up to 12″ depths so I think I’m going to have to explore some other lumber suppliers to see if I can find 16″! My other pantry shelves were 20″ deep, so I used two 10″ pieces side by side and it worked well, but good to know that I should be able to find 16″ common board somewhere. Thanks again for the inspiration!
Melissa George says
If you have a Lowes nearby, try them. They usually have it in a few different lengths like this – https://www.lowes.com/pd/Common-1-in-x-16-in-x-6-ft-Actual-0-75-in-x-15-25-in-x-6-ft-Edge-Glued-Finger-Joint-Pine-Board/1000088891. Send me a picture when you’re done (melissa@polishedhabitat.com)!
Tara says
Perfect – thank you! I didn’t even think we had a Lowe’s (we’re a military family and just moved this summer – have only seen multiple Home Depots here) but I clicked on your link and there is one. Woohoo! Darn those actual sizes, though (was really wanting 16 full inches but that’s not how it works. Ah well! I’ll post some pics once it’s done…hopefully in two weeks 🙂
EILEEN-RIPP-EMERSON says
Absolutely, Love, Love, Love this closet do over! You have so inspired me to rearrange closets and storage areas. Not only at home but at company I work for I kind of am a “Jill of all Trades” so find having all items organized I can cover more area faster instead of having to search for something I know I have but not where it might be when I need it! One thing I do do differently, is use clear plastic containers or baskets that I can see thru so I don’t need to look for something by pulling the container off shelf.
Andrea says
I’m inspired – i may actually try one or two of the ideas – AT LEAST! (found this thru the latest issue of Better Homes and Gardens magazine 😀 )
Melissa George says
Thank you so much for taking the time to visit after seeing the magazine. I appreciate it! I’m glad you found some ideas that will work for your home!
Lori says
Awesome. Doing it this week. Did you use stair treads for the shelves or an mdf. I love home projects and decorating. My peaceful place!
Melissa George says
Hi Lori,
We used 16″ wide lumber from Home Depot for the shelving.
Karen Sue says
Working on converting the linen closet to house the vac and get it away from the coat closet! Waiting for my drill to recharge and then I’m on to the finish! Thanks for the tips and the courage! Turning a mess into a masterpiece!
Melissa George says
I’d love to see a picture of your finished space! I hope you love it as much as we love ours!
Chris says
Melissa,
What were the inside measurements of the closet to begin with?
Thanks!
Melissa George says
Hi Chris,
The closet is about 35″ wide and 26″ deep.
Thanks!
Rick says
Silly me, but where are the coats?
Melissa George says
Two spots – on a freestanding coat rack in the main entry (see here: https://www.polishedhabitat.com/rugswap/ ) and on the hooks in the small entry from our garage (https://www.polishedhabitat.com/diy-coat-rack/). Now they’re actually put away right away because we don’t have to fight to get them in the closet. Plus, in Oklahoma, we only need the coats a few months of the year. The rest of the time, the bulky ones are tucked away in a guest room closet.
laura says
hi melissa, sharing your closet in my post on my own version of a reimagined coat closet!
Sharing a link back to you! Hopefully post goes live on Wednesday (new puppy is interfering with work and blog)! ha laura
Melissa George says
Ah, thanks, I’m excited to see it! And yes, we have a 4-month-old Goldendoodle, so I get it! He’s great, but not conducive to getting much done!
Joe says
This has been put on my to do list by my wife. I do have a question. How many inches is it between the shelves?
Melissa George says
Hi Joe,
We built the shelves around the baskets we were using and the height of our commonly used supplies. They range from 9.5″ to 12.5″. Of course, since then I picked up a spray bottle at Lowe’s that is about 14″ tall and doesn’t fit. It’s the ONLY cleaner so far that doesn’t fit on the 12.5″ shelf, but if possible, it would hurt for you to work in one that is a bit taller than ours. Hope that helps!
Kelli says
Fantastic transformation. You basically doubled your space. Nice work!!
Larissa says
Using your design for my supply closet inspiration! Right now it’s just an absolute mess and since we’re all stuck at home, I’m using this opportunity to get serious about organizing! Unfortunately, the closet I’m using also has my crawl space access so I can’t build shelves, but I did find some free-standing Ikea shelves that should work for the half-width shelves instead. Also, those baskets appear to be back available on Amazon again! I bought 2 of the black and white set because they’re quite a bit cheaper than the gray and white.
Melissa George says
That is awesome! I’m so glad you’re using the time stuck inside for good. I’m working on my own list of projects I want us to get done!
Nicki says
During the stay at home orders my husband and I tackled this project. Super simple and a huge improvement. Thank you for sharing your creativity with us.
Melissa George says
I’m so thrilled to hear that, what a great use of your extra time without commitments outside the house. I’m hoping we can tackle our bathroom closet in a similar way while we’re home.