
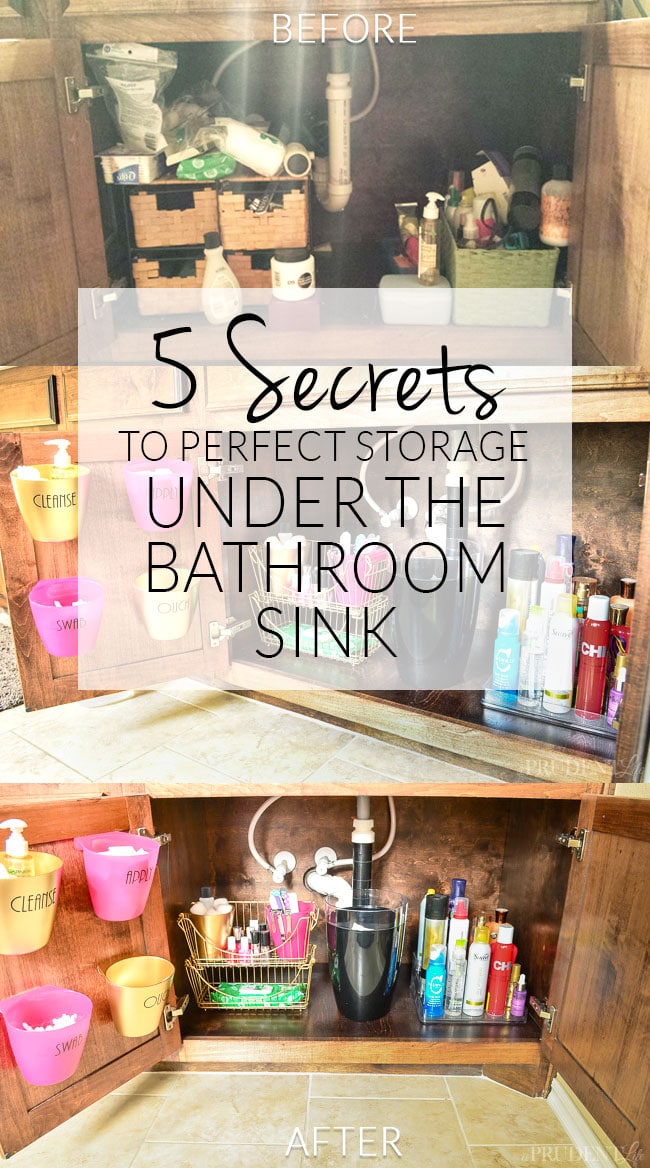
Is the area under your bathroom vanity a mess? If so, this post is for you!
I’m constantly in and out of the cabinet under my sink, and every day for months I’ve been annoyed at the mess. I finally got it under control and it turned out even better than I planned.
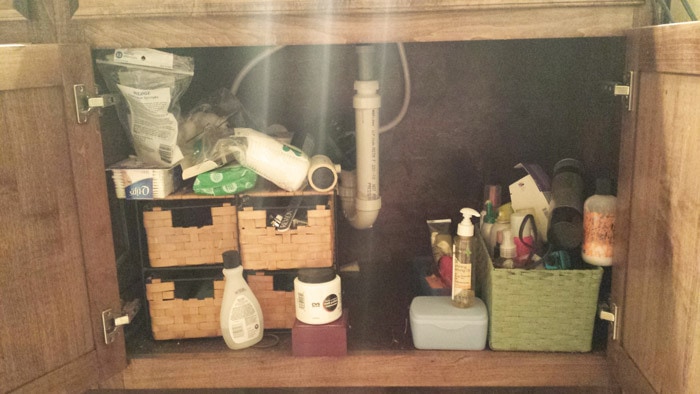
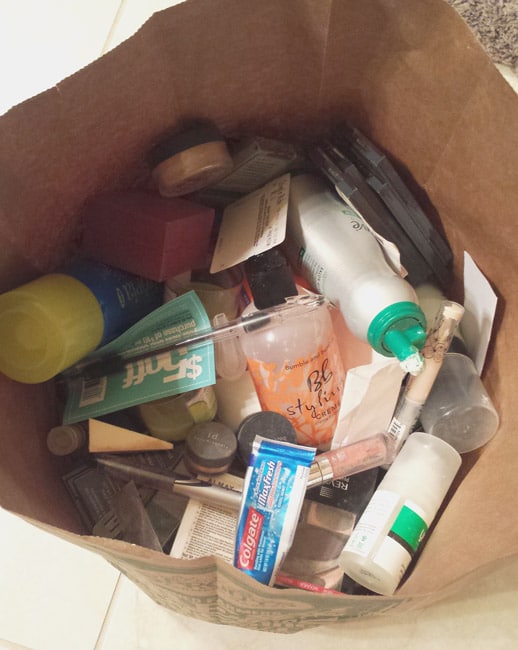
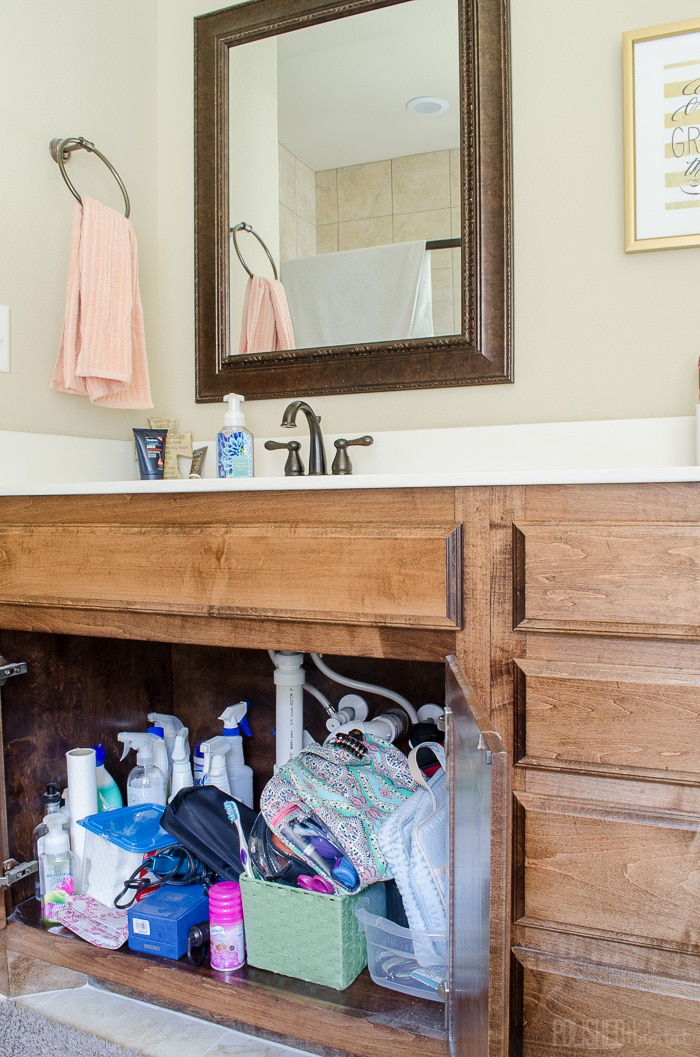
The before picture I’m about to show you doesn’t really reflect the worst part. In the emptyish space in the middle, there was a cheap clear trash can that was ALWAYS overflowing, no matter how often I emptied it.
Since everything else was so cluttered, I’d find Kleenex in my hair product bin. Ugh.
The really crazy part of this mess was that I only used 10% of the stuff jammed under there. There was no room for my CURRENT products, so those ended up on top of the vanity.
Which leads me to my first tip…
1) Declutter with HONESTY
It can be hard to get rid of products that aren’t empty. But I’ve got a hunch I’m not the only one who has ever purchased a hair product, used it awhile, and decided it wasn’t for me.
Then they linger. For YEARS. Because you spent good money on that creme, mousse, or magic potion! But you know what? If you haven’t needed to put it on your hair (or face or body) in the last year, it needs to GO.
Having the old stuff around is a lot more costly than getting rid of it. It’s just creating aggravation in your life that you don’t need. We have traffic jams for that.
Pull EVERYTHING out of your vanity and be honest. Are you 99% convinced you will use the product in the next 30 days? If not, out it goes.
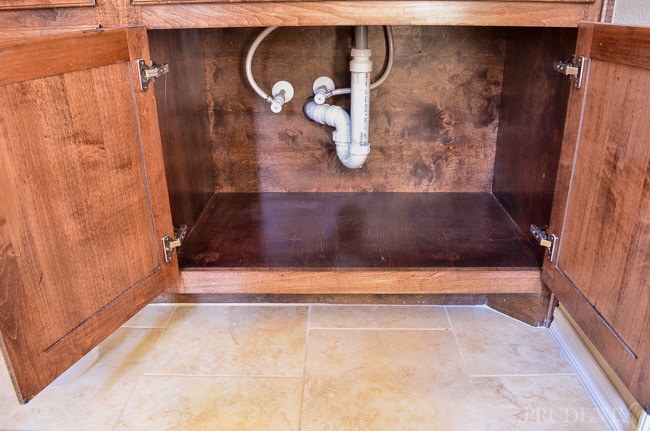
Ah…the cabinet is so much better empty. Every time I clear a space out like this, I feel like I can BREATHE again.
2. Create Zones
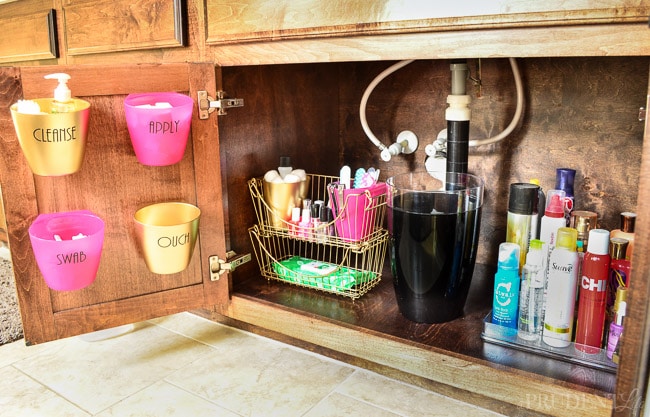
Think about what you use from the cabinet. I ended up with three groupings of items – hair products, nail stuff, and cotton-y stuff. I didn’t know what to call the third group, but basically, it’s the stuff I’m in and out of the cabinet for constantly. Things like make-up wedges, cotton makeup remover pads, & Q-Tips.
Once I knew what types of things I needed to organize, I looked around the house for bins that would fit each need.
I also wandered through WalMart to find a new trash can and see if I had any other ideas. I did. And it was brilliant. Stay tuned for that in a later step!
3. Use the Doors
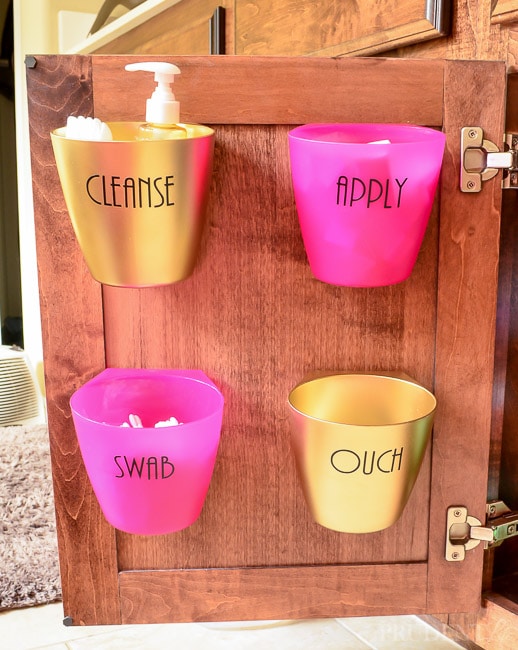
I’m a huge fan of using the cabinet doors for organization.
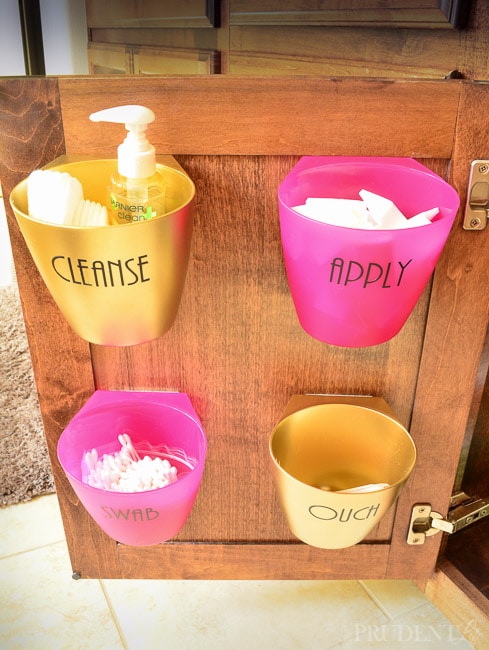
I knew I wanted to use the door space in the bathroom as well. Specifically, I wanted the items I used all the time on the door so I wasn’t digging through a basket every day.
I already owned the perfect solution! I had some leftover IKEA containers that I didn’t use when I organized the craft room. I used Command Large Picture-Hanging Strips to attach them to the door. These containers were discontinued, but here’s a good alternative.
I used this process to make labels for them!
4. Think Outside the Bathroom
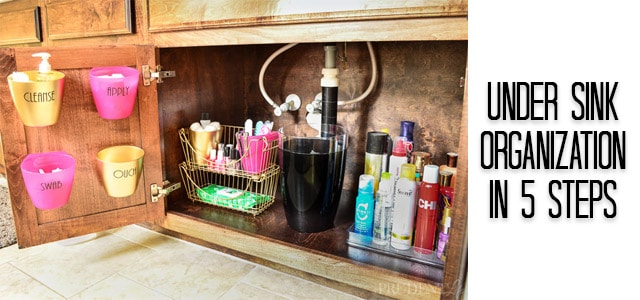
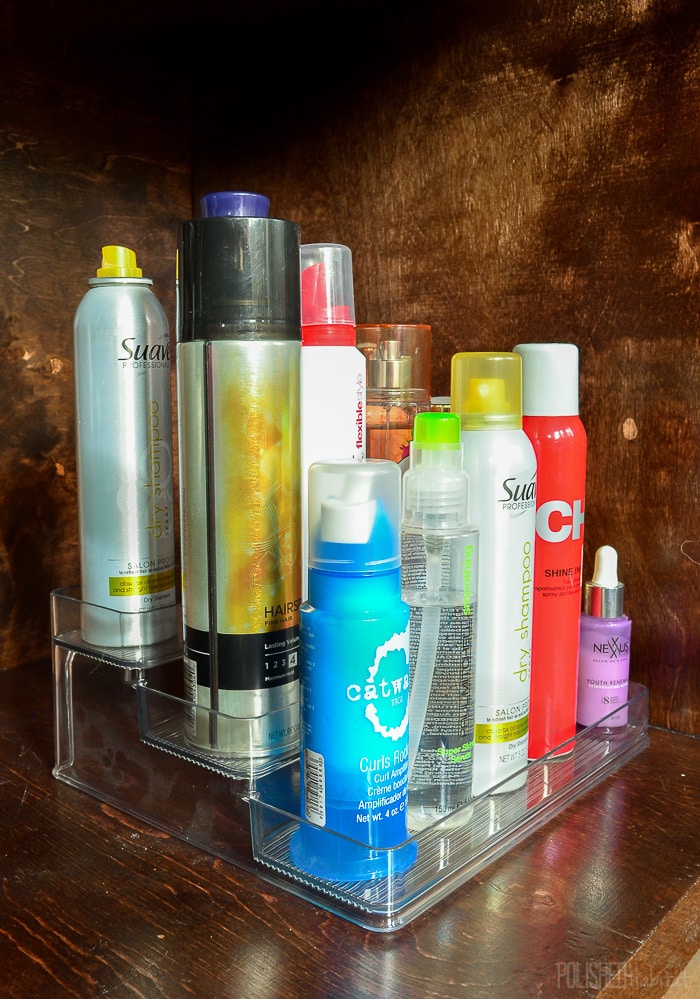
Remember how I said my WalMart wandering led to something brilliant? I found an acrylic tiered spice rack that is absolutely perfect for hair products!
I had enough room to add some lotions and STILL have some open space for future purchases. I’m definitely going to be buying more of these stands for other organizing projects. I found the same stand on Amazon if you want one delivered!
5. Make it Pretty
If you’ve read any of my prior organizing posts, you know I’m all about adding a pretty flair. It’s fun to plan how to make a project pretty, and it makes fun blog photos, but there is a bigger reason.
My natural tendency is not to put things back where they belong. I’m working on that, but I’ve found that if a space is extra pretty, I want to keep in that way. Especially if it’s labeled!
Usually, the pretty touches are inexpensive and don’t take long. The joy I get in seeing the pretty outweighs the extra time and cost tenfold.
One of the quick changes I made to make this project prettier was to spray paint these stacking metal baskets in Rustoleum bright gold. 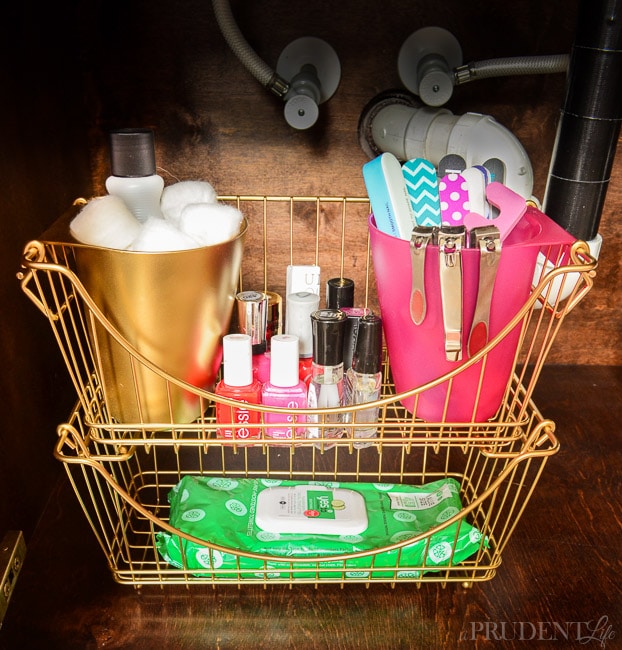
One holds polish remover and cotton balls and the other was perfect for files and clippers. I’m loving that the whole set up is portable. I can take the whole basket to the kitchen island where I normally end up doing my nails.
Sometimes when I’m walking through our bathroom, I open the cabinet door just to admire how much better it looks.
Next up, make sure you click over and check out how I organized under the other bathroom sink. It includes cleaning supplies and a clever way to keep track of the date we are supposed to change our contacts. Here’s what it looked like before, click the picture to see the after!
AND then don’t miss how to organize the bathroom counter and tub surround!
Are you inspired to organize your bathroom?


Rana says
Thank you for these tips. I love the way this came out. I have been trying to organize our bathrooms but haven’t found a solution that sticks. I am bad at pat putting things back as well. For me, I need to make sure that it’s easy to put something back. If I have to move 5 things out of the way its not getting back in its spot which is pretty bad on my part. 🙂
Melissa George says
Oh you are not alone Rana! I need to be able to see as much as possible and never have to move things around in order to put something away.
Wimbledon house cleaners says
I love what you have done with your under sink space. Great storage tips. Thanks for the inspiration. I think it`s time for some spring cleaning 🙂
Kay says
Your e-mail couldn’t have arrived at a better time. I’m planning on working on the cabinets under our sinks this weekend. They’re not messy but they are boring. . .very boring. I hope I might be able to find a couple of tiered spice racks. They would be perfect in the cabinets. One thing I have to figure out is what I’m going to do with our cat’s stuff. In my bathroom the last couple of feet of the counter top has space beneath it for a vanity chair – instead, that’s where we keep her litter box. There’s plenty of room to put a couple of acrylic shoe boxes (one atop the other) beside the lb. Then, I want to get one of those corrugated display boards that kids use for science displays, wallpaper both sides and move one of three sections so she can get in/out. That’s one bathroom down and one left to do.
Maria Daniels says
Wow so pretty!!
Terra says
You should put “TOSS” on the garbage can! Cute! 🙂
Krista says
Fantastic! And pretty, to boot!!
Cj says
Some good ideas. However, I would be interested in knowing where you put your bathroom cleaning supplies and dreaded plunger…?
Melissa George says
Great question! We have a double vanity now, so my husband is stuck with the cleaning supplies and I think the plunger is over there too. I’ve got in on my list to do his side soon, so hopefully I’ll come up with some good ideas and you can combine them with the ones from my side to blend the girly stuff with the reality stuff.
Daisey says
Where do you put your perfume? Any pretty ideas/pics for that ?
Melissa George says
Hi Daisy, I just have one that I use regularly that I keep on the vanity. There’s a picture in this post so you can see how I put it in a pretty container: http://www.polishedhabitat.com/2015/master-closet-organization/
Ines says
This is the best under – the -sink I have ever seen! Oh, it is so beautiful. I am new to your site, I love the black acrylic waste basket in the middle – do you think it’s still available somewhere and may I ask, where from? I think your style is exquisite. Happy to have found your site.
Melissa George says
So glad you are enjoying the site Ines! That waste basket was actually from WalMart of all places, and last I noticed, it was still available in our store. Hope you can find one!
Ines says
Thank you. It looks so chic I would’ve never thought it is from WalMart.
Kelsey says
Do you have any ideas for straighteners and hairdryers? I have one of each and really need them under my cabinet. This is amazing btw!
Melissa George says
Hi Kelsey, so glad it was helpful! I just did my husband’s vanity cabinet and realized that plastic storage drawers are great for straighteners, hair dryers, etc. You can see them here: http://www.polishedhabitat.com/2016/bathroom-organization-sink-vanity-cabinet-side/ The drawer on his side has the ones I use less often, like curling irons, but I think I’m going to grab another drawer for my side and put it under the tiered rack the hair products are on. It should be perfect!
Carolyn Baker says
I love the idea that if you make something prettier you are more likely to keep it organized. That’s so true! I would have never really thought of it that way but I can see why that would be true. I’m moving soon and I’m going to start from scratch with my organization so hopefully it doesn’t’t get out of hand. Thanks for sharing 🙂
Melissa George says
Thank you, Carolyn! It took me awhile to figure that out in my own life, but now I’m a firm believer in pretty organization!
Willow says
Great ideas! I just finished doing under mine. I went from a vanity with 6 drawers and a double door to just empty space under a double vanity. Mine looked worse than yours after a year! I also separated according to function and tossed a full kitchen trash bag full of almost empty or items that had not been used since I moved or before. Next I used a wire plate rack, one raised tier and left the cardboard on it for stability of bottles. I had a large wicker basket and 2 small ones. I created zones… hair clips, ties, hair masks, etc in large basket, nail stuff in one small basket,. the hair product bottles lined up in center. The right side has the rack with tall body lotions on left, on right is face moisturizers, cleansers, etc all arranged with largest to back to small in front. Under that is the other small basket with face powder, masques, etc. the makeup that over took everything and took me forever to dig through is now organized in a 4 tier organizer on top the vanity between sinks. The jewelry is now hanging on hooks on one door. My makeup palettes is in a command bin on the other door. The other half of the cabinet was all medical, cleaning and hair dryer with diffuser, curling iron, bfs razors and his supplies, light bulbs that fit fixture above sink, cotton balls, qtips,etc. I had 2 wire rectangular baskets that were an inch too wide to mount on doors. I used one for medical items, in back. The other was used for cleaning supplies on right. Bulbs stacked behind. On left I have mouthwash, his bottles of wash, etc lined up. Small wicker basket with oral care stuff. I bought a over the door dryer holder with basket that holds the dryer, curling iron, clippers, spray bottle and mousse but not the diffuser. I was frustrated as I had nowhere to put it. But I had another rack of hooks and popped it over the other door…it fit on one of the hooks and stayed! I still had cotton balls and qtips to deal with. Got a holder that holds both and placed on my side. They were not able to hold all though and my woman stuff had no place. So I installed a wire scroll over the toilet rack (used to be in guest bath at old house) and added 2 baskets to hold back stock and personal items out of sight. Used one shelf for towels as I had taken down a towel rack there to install it…the 3rd shelf is decorative items that used to sit on the top of sink. I love it! Now i just need to get glass cut for the broken shelves in medicine cabinet!
Melissa George says
That sounds amazing, it was so smart to use a plate rate and fits right in with the tips!
Sam Ali says
I always forget to use the door as an option for storage. This is a great idea!
Melissa George says
Thanks Sam, it’s my favorite bonus space to organize!