
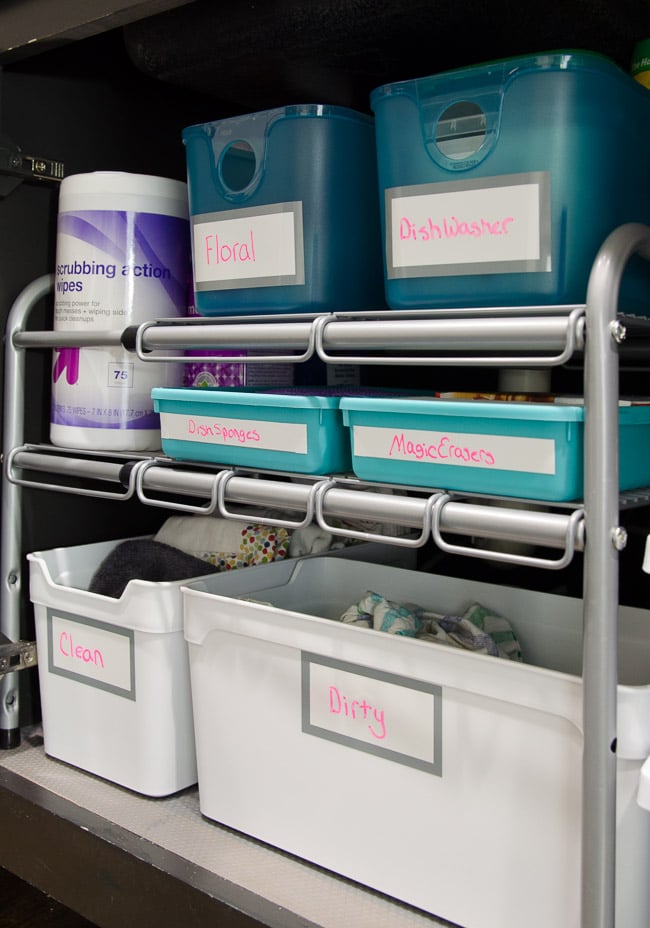
As I instinctively opened the door under our kitchen sink today to toss a dirty towel into the designated dirty towel bucket, I was SO grateful that cabinet got organized this year.
It also made me think about all the spaces in the house that are now working for us after receiving a little attention.
I originally wrote this post in 2014, and six years later the lessons all still resonate with me. I’ve updated them with new examples, but these fundamentals have held up in the test of time.
Make sure you pin this post to re-read each time before tackling a new organizing project. In no time, you’ll know how to organize your life!
How to Get & Stay Organized
Ask what is NOT needed in the space.
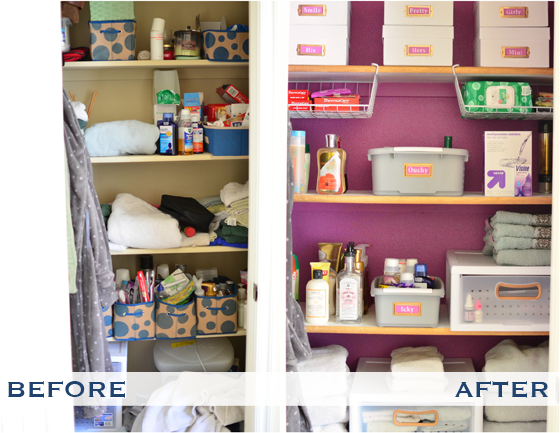
In our master bathroom closet, I was able to get rid of quite a few towels. I realized that the more towels we had, the more dirty towels could pile up before getting washed.
Eliminating some of the towels keeps the shelves neater and the laundry pile smaller. I admit that I was a little skeptical of this plan, but it’s been 11 months SIX YEARS and it really does work.
We’ve accumulated a few more towels over time and it’s time for me to purge them again.
Now, when I start any project, I ask myself what can be eliminated from the space.
Some things are relocated to other rooms, and other times the items can be sold, donated, or trashed. When you get rid of things FIRST, it lets you better plan for the items that are left.
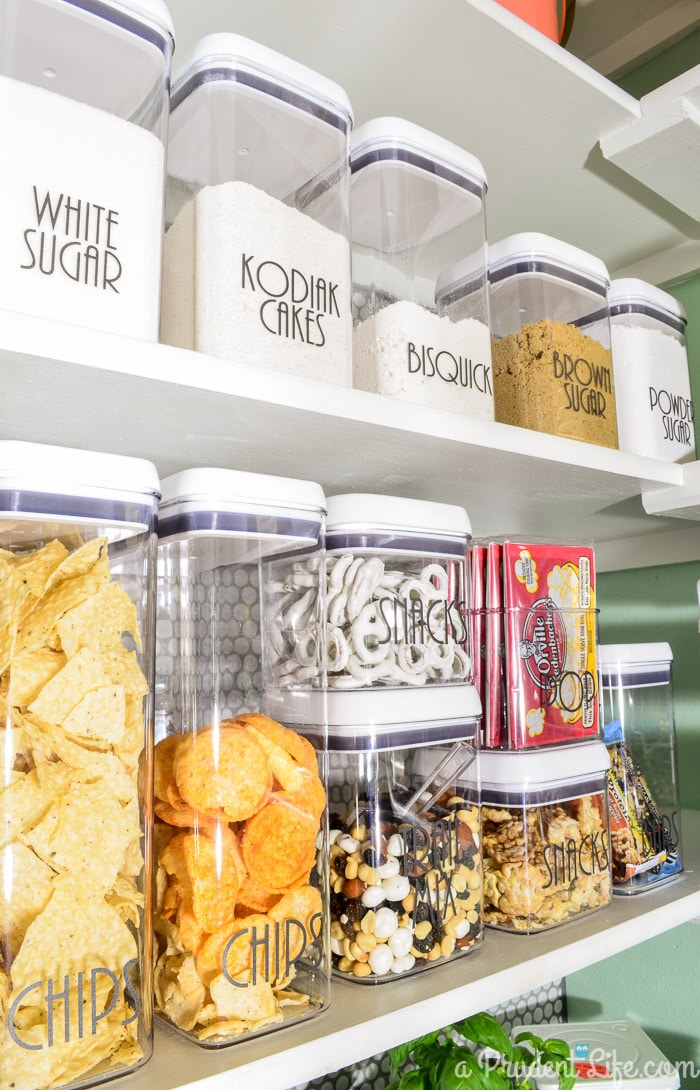
During the pantry makeover, I got rid of 75% of the cookbooks. I never used them so there was no reason for them to be taking up prime real estate!
The RIGHT containers make a difference.
Learning when to save and when to spend on organizing materials has made all the difference. In my before photo of the bathroom closet above, there are some soft-sided bins I got at the Dollar Tree.
I LOVE saving money, but in this case, I wasted at least $10. The bins just weren’t functional for the space. Instead, I used photo boxes (white boxes on the top shelf) for my stockpiled toiletries.
They were a much better choice because they are stackable and have built-in labels. The best part is that they are also inexpensive! Michael’s has amazing sales and you can get 6 boxes for $10.
My favorite purchase for that closet was the plastic drawers.
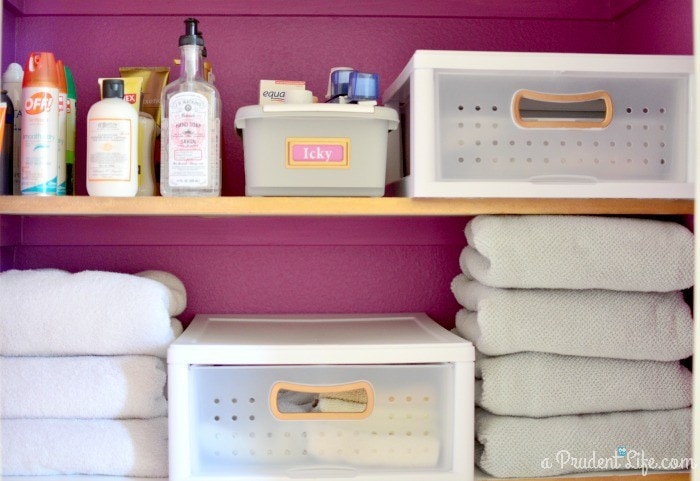
They work triple duty as shelf dividers, shelves, AND actual drawer storage.
Having one of the units divide the bottom shelf keeps the towels in neat piles on each side, provides room for hand towels on top, and hides away washcloths & hair towels. I don’t know about you guys, but our washcloths would never stay neatly piled on the shelf. Now it doesn’t matter!
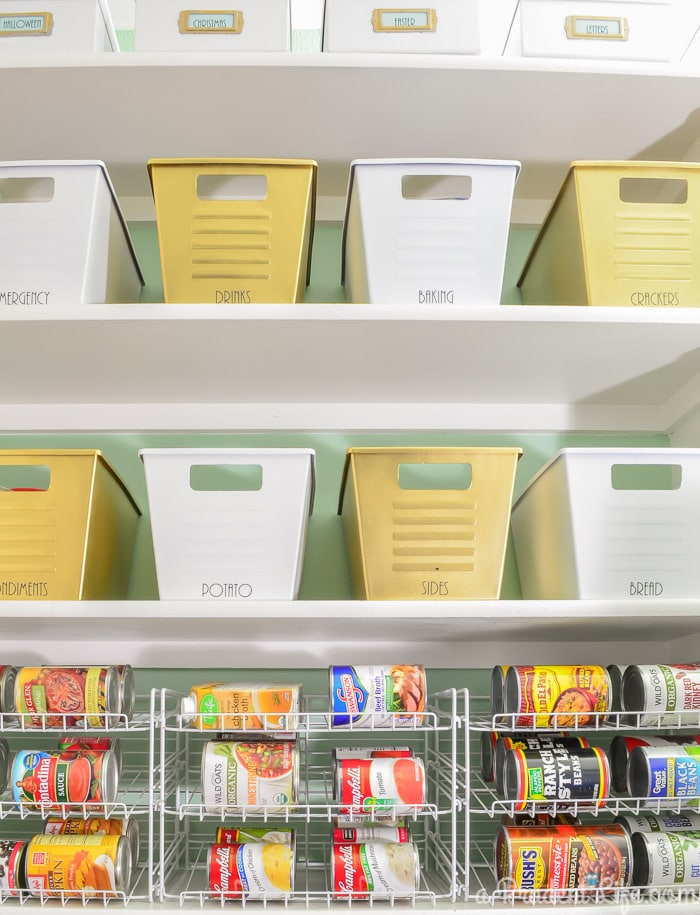
In the pantry, I felt like I was splurging on can organizers, but again, 6 years later they were more than worth the small investment because I can check the inventory quickly and find what I need easily.
Tired of never knowing how many batteries we had on hand or which cabinet drawer they were stashed in, I realized that people had already solved the problem for me.
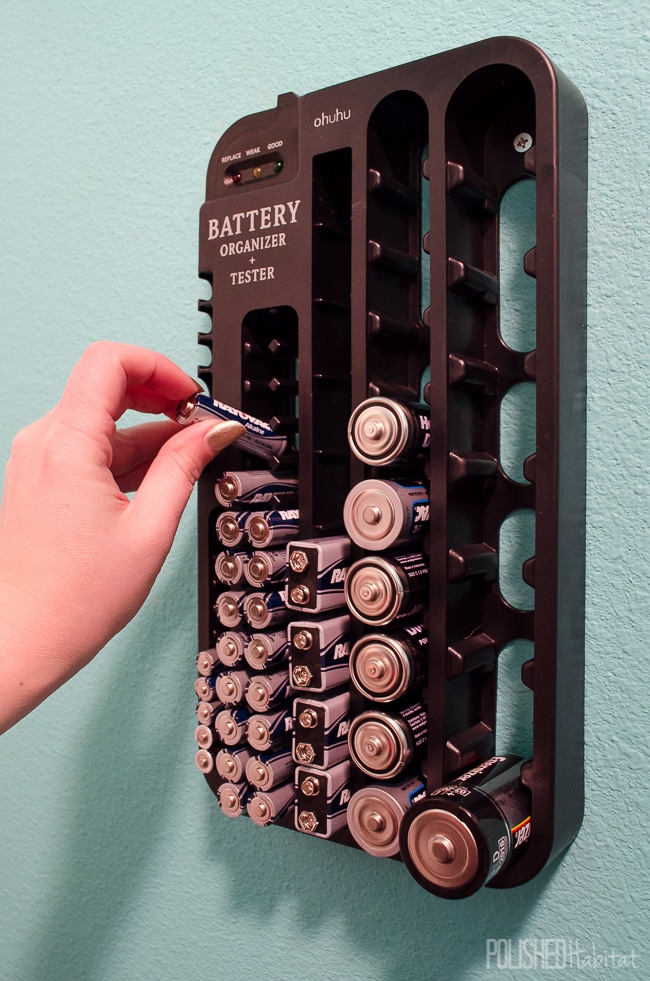
We ordered an inexpensive unit designed to organize batteries and it works better than anything I could have DIYed.
Making it PRETTY keeps it pretty.
Obviously, most of you aren’t going to go around painting all your closets purple. But you can use uniform labels and colors to make your space pretty.
For me, adding little touches of gold didn’t cost anything, but it ups the happy factor of the closet. When you open the door and see things that make you smile, it’s a perfect incentive to put things back where they belong.
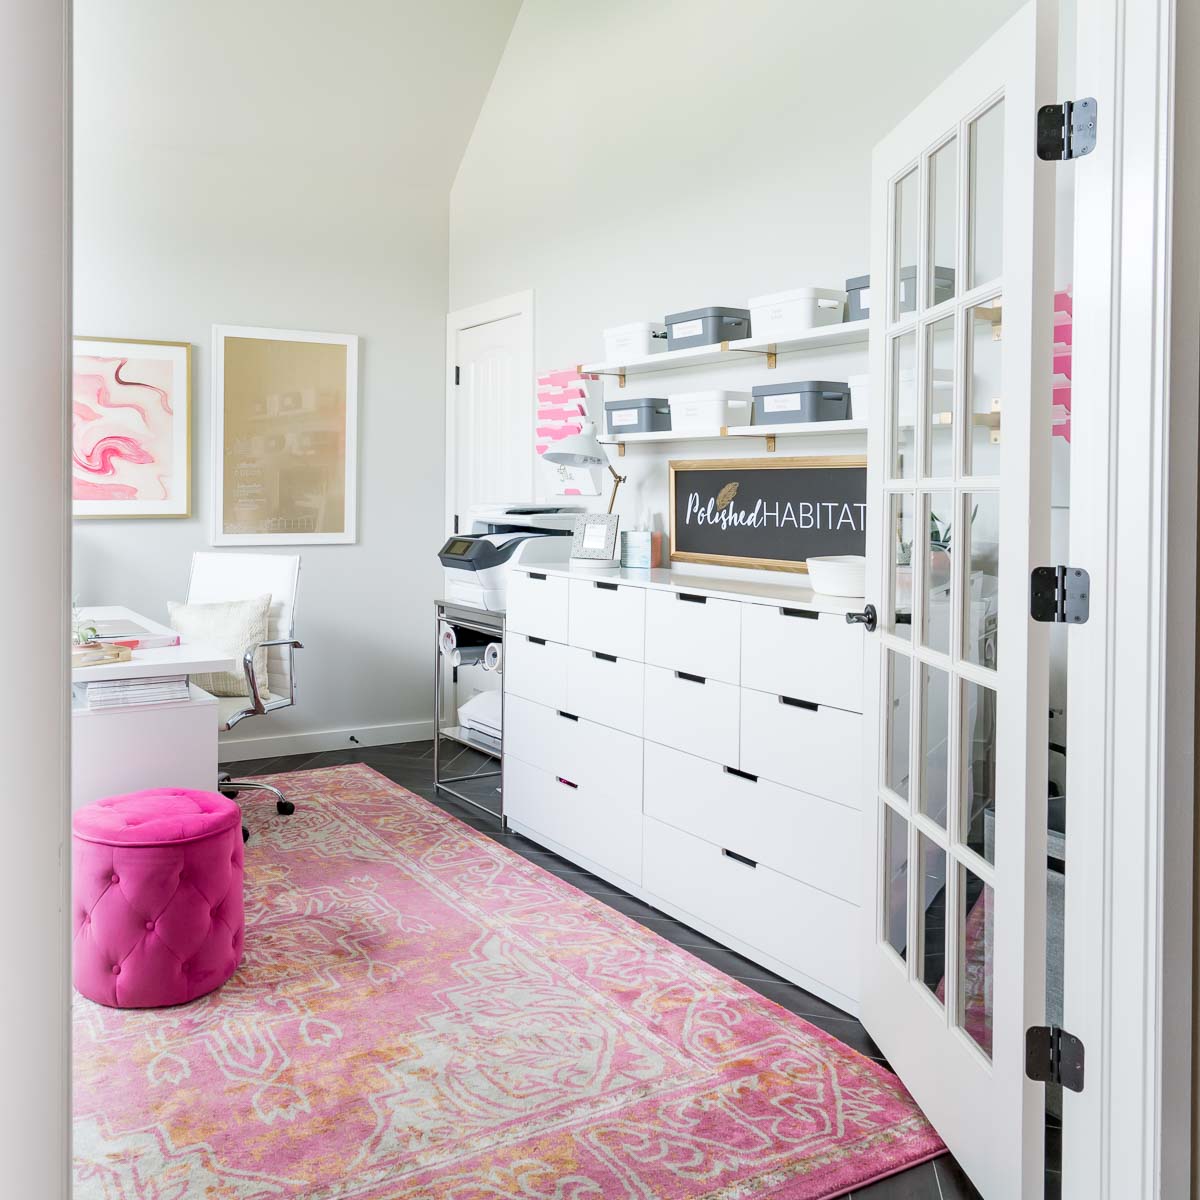
My home office is another example of this. I was able to create a pretty space that I WANT to keep tidy.
Go vertical!
I wanted my craft supplies to be easy to access without taking up too much space. I took advantage of the wall space using inexpensive IKEA rail systems and shelving.
Both allowed me to have more supplies within easy reach while still confining the craft space to one corner of the room.
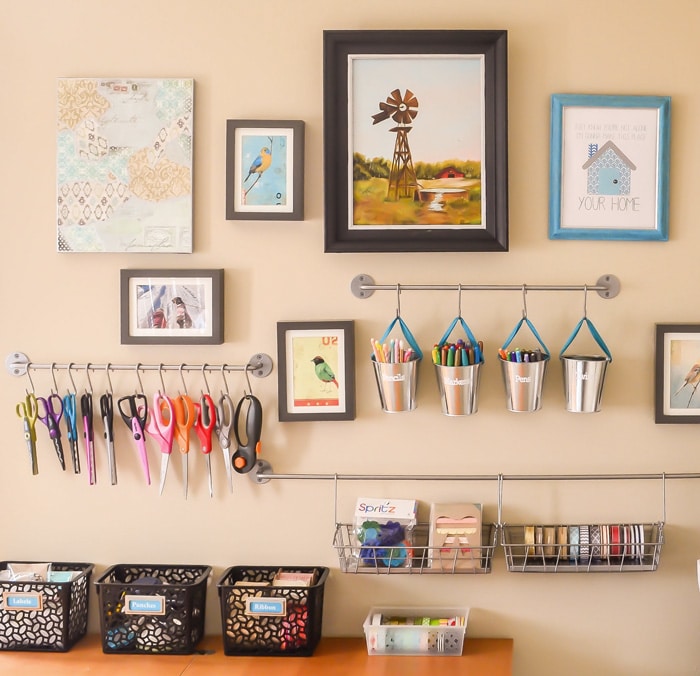
The “make it pretty” lesson I learned in the bathroom closet came into play and I blended some artwork with the organizing rails to turn the functional space into more of a gallery wall.
Going vertical also works great under the kitchen sink. Using the backs of the doors added room and made items more accessible.
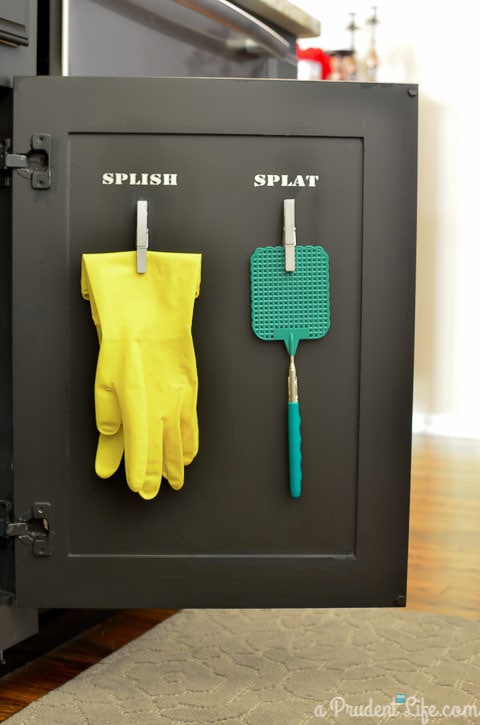
I now have an entire post on 11 ways to organize using your cabinet doors!
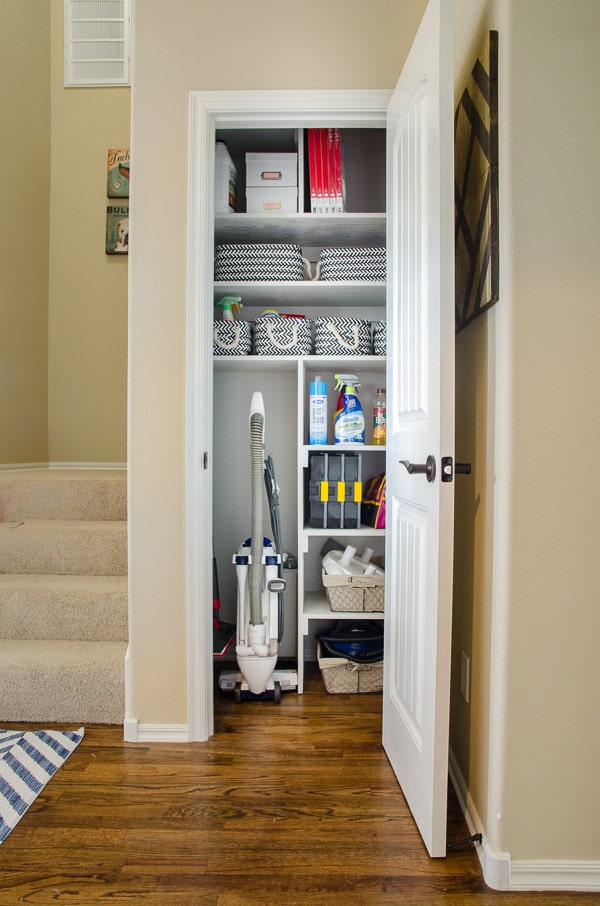
The vertical organization tip also came in handy in the office as you saw above and in our former coat closet turned cleaning closet.
Previously, the ceiling height was totally wasted. Now we have shelves up high for infrequently needed supplies like bulbs for recessed lights.
Label EVERYTHING!
One thing you’ll notice in all the pictures above is serious amounts of labeling.
There is something mentally rewarding when you put an item back into it’s labeled home.
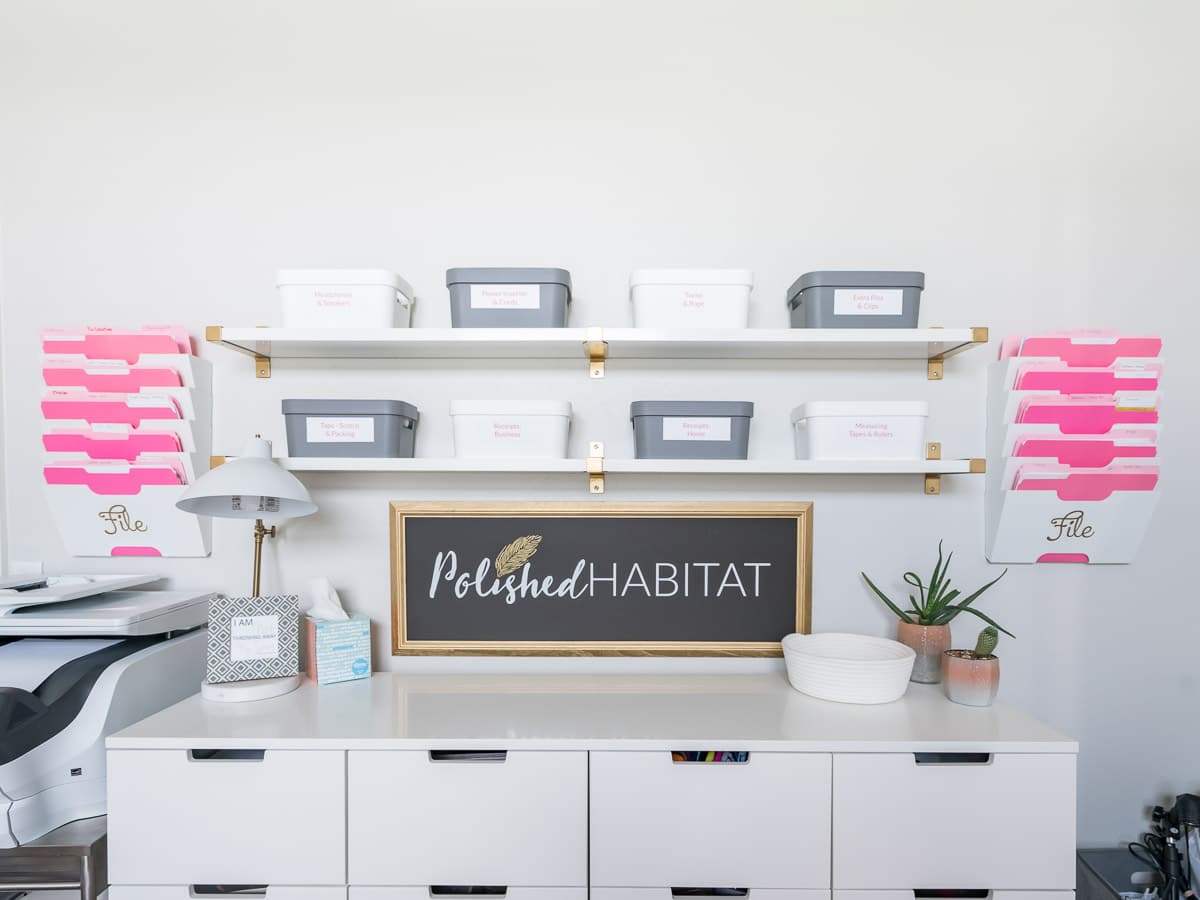
On the other hand, it’s disturbing to put something in an area that has been clearly labeled for something else.
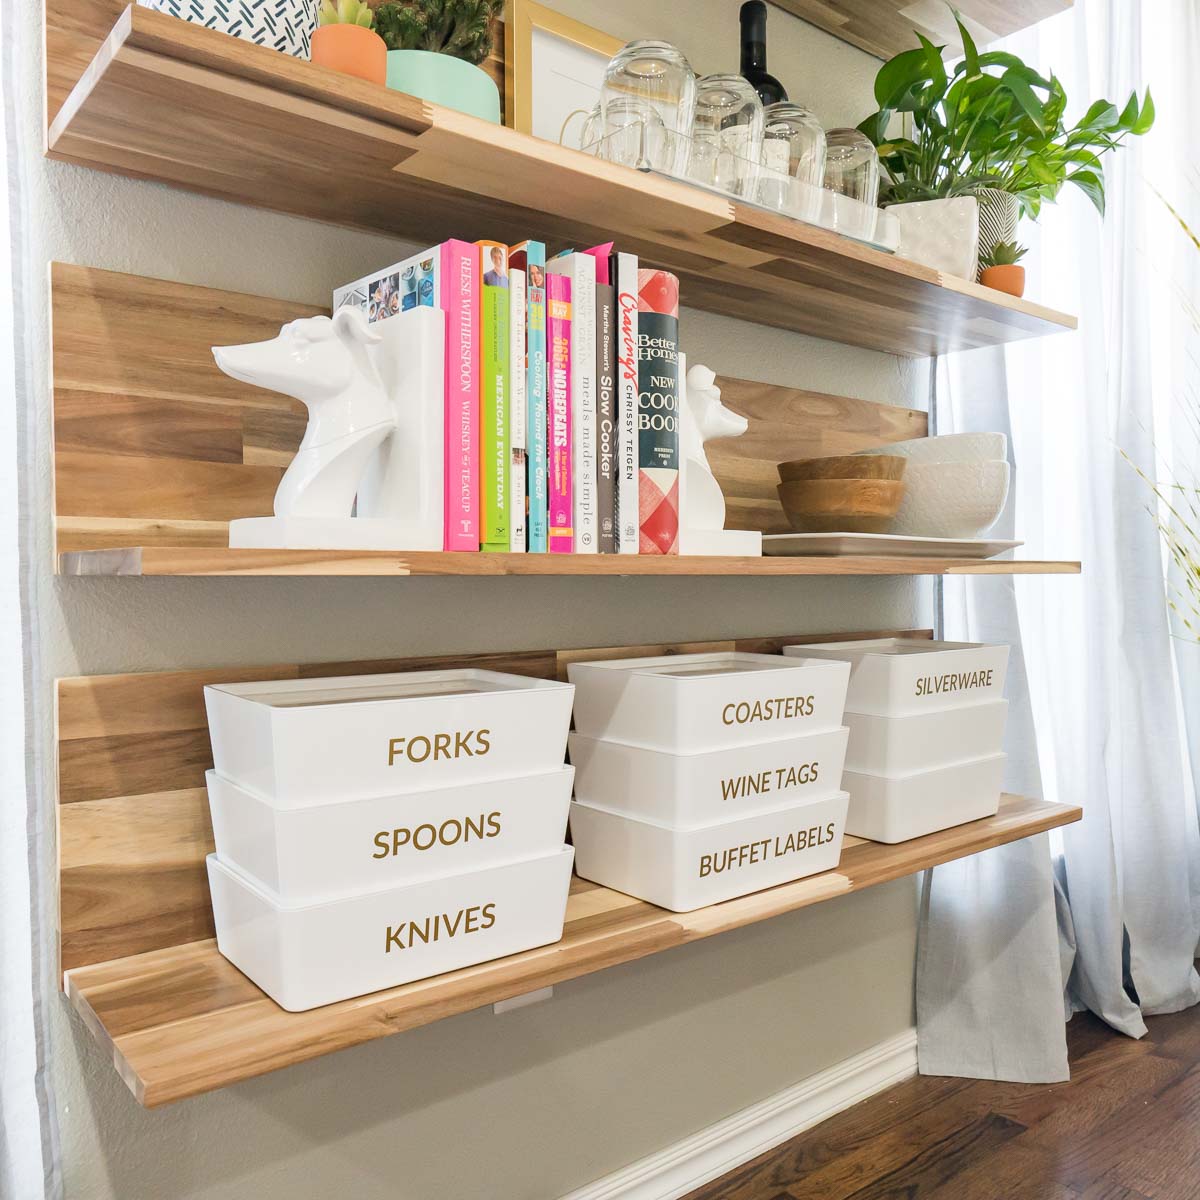
If that wasn’t enough, labels keep everyone in the house on the same page.
For most of my labels, I use my Cricut Maker to custom make DIY labels out of vinyl. A less expensive option would be investing in an electronic label maker or simply adding a dry erase label.
Think outside the box
As you start organizing a space, brainstorm your challenges.
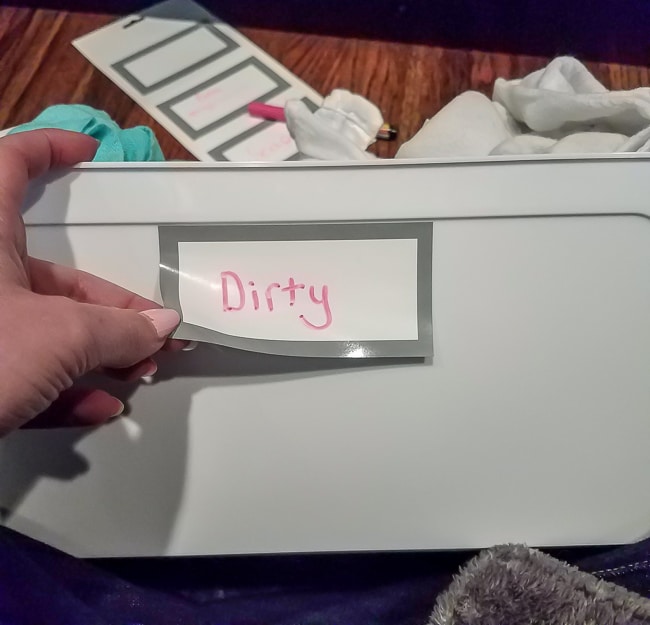
At the beginning of this post, I mentioned my dirty towel bin. When I decided to clean out the cabinet under the kitchen sink, I had a towel issue.
There wasn’t really a clear method to know what was clean and what was dirty. I picked up a container and designated it “dirty”.
It’s like a miniature clothes hamper for the kitchen. I LOVE it.
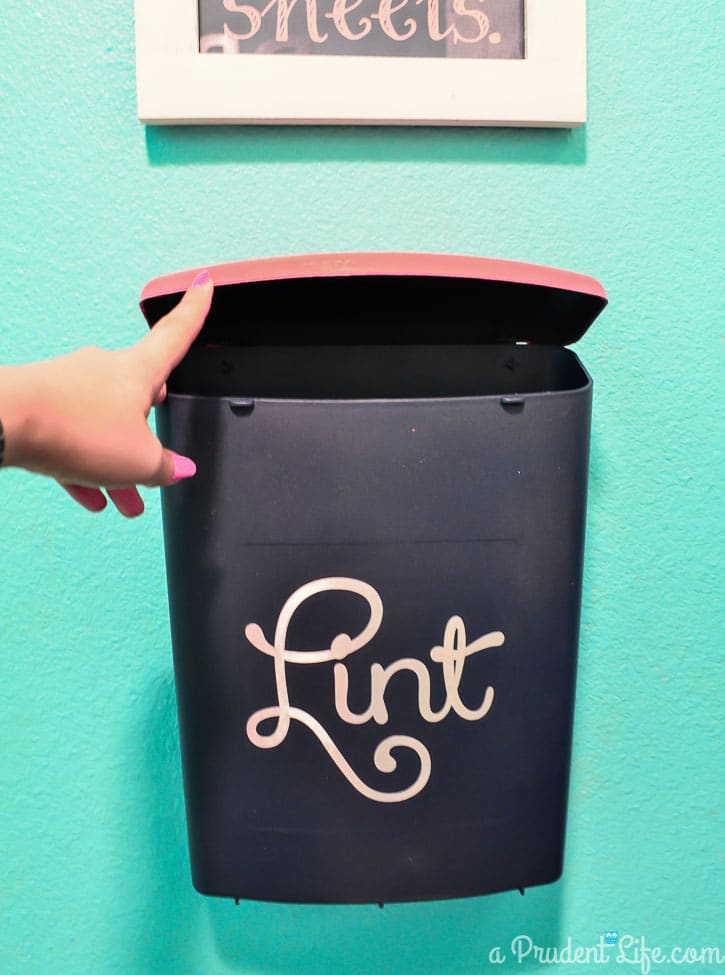
During my old laundry room, before the big laundry room makeover dryer lint was a problem. We don’t have room for a trash can, so had been using a shoe box on top of the dryer instead.
It was functional, but not the most attractive. I wanted something that would look good AND get the job done. I ended up making over a real estate literature holder into a wall-mounted trash can for lint by painting it and adding a label.
Brainstorming my problem led me to an outside-the-box solution that has been working brilliantly. Five years later, this is still one of the most impactful changes we’ve made to the function of our home.
Do what works for YOU
Every single household is different. The spaces are different and the people are different.
A whole group of people think I am COMPLETELY ridiculous for making the lint bin, but that’s okay. Those people didn’t have our problem, so they don’t understand our solution.
More people were vocal about their dislike of my pantry makeover, they preferred the messy before photo. Lucky for me, it’s my house and not theirs!
The first 6 points are the ones that I have found to make the biggest difference for us. As you tackle your spaces, a different set of guidelines may develop.
Each time you start a new organizing project, review what worked and what didn’t from your last project and eventually you’ll have the perfect system for your household.
Now let me know what organizing project you’re ready to tackle in your home in the comment below!


Breanna Blackmer says
I love this! I’ve been planning on reorganizing my whole house, but more importantly my bathroom and office/craft room space! I think the labeling and using photo boxes are really going to help me(:
Melissa George says
I’m glad to hear that! The photo boxes are helpful for SO many things in both of those rooms, and you’ll love having everything labeled!
Brooke Kozlovsky says
Once again I wanted to tell you how I love your emails… It’s 2019 now we are still renovating so cannot really do all that I would love to be doing on the organisation side of things BUT one day will be able to. I think zi have done the best I can for now…. but everyday still trying to organise stuff in my head… how can I move my fury around to make it feel different lol… anyway keep up your amazing work…. xxxx
Melissa George says
Ah, thank you so much Brooke! I’m so glad you’re still enjoying them! Best of luck with the rest of your renovation!
Jan says
U have soo many great ideas Thanks for the tips.
Melissa George says
Thank you Jan!
Cindy Leish says
Great post! I love the white mulit-drawer unit you have in your home office. Can you share where you purchased it and if it accommodates hanging file folders?
Melissa George says
It’s a dresser from IKEA! All the details are at polishedhabitat.com/office
Pamela Heebner says
I sold my house and was forced to donate half of the contents to Goodwill, etc due to my moving in to take care of my Mom in her condo.
I am slowly getting organized in my bedroom – all I need is a desk/bookcase combo and I would be done.
I totally love the big labels in your bath closet and on the containers in your pantry!!! Were they both done on a cricut machine? What font did you use for bathroom? What font for the pantry containers? My 95 y/0 Mom has ARMD and those labels I know would help her.
Thank you for the useful article and great pix.
Melissa George says
The font in the pantry is AR Bonnie and they were done in vinyl with the Cricut (well, actually Silhouette brand, I’ve since switched to Cricut, more on that coming later this month!). The bathroom labels were just printed for the label holders. I made a colored rectangle in Google Docs and put white text on top of it (in Google Docs before printing). Word would also work if you have that! I’m not sure what font that one was anymore, but maybe you could test a few and let your mom pick out which is easiest for her to read? Best of luck with the rest of your organization – your mom is lucky to have you!
Sherry says
Hi Melissa,
What shelving did you use for the small hall closet you use as cleaning supplies & vacuum storage? I have a really tiny coat closet, I want to convert like yours for supply storage.
Thank you,
Sherry
Melissa George says
Hi Sherry, We custom built (which sounds way fancier than our actual skill) all the shelves using 16″ wide pieces of wood from Home Depot cut to the width of the closet, and then set them on 1 x 2 braces all the way around. It’s a great entry level project if you have (or know someone with) a miter saw & nail gun, but could be done with a simple circular saw and hammer and nails. I’ve also heard from readers that have hired handymen to do it, but I don’t have any idea what the cost would be. It shouldn’t be more than a day’s work and $100-$200 in materials depending on wood needs and pricing. Hope that helps!
Bonnie says
Who complained? I love all of these ideas! We’re getting ready to move, so I need to purge and organize, then unpack and organize in the new house. Thanks for all the tips!
Melissa George says
Thank you Bonnie! Most of them were Good Housekeeping readers after they featured the pantry online. The comments were nuts! SO many of them said I “cheated” and it “wasn’t real” because they counted and there were way fewer cookbooks than before. Which was true and real because I got rid of all the ones we never use! They were also concerned that I had less prepackaged food items than a “real pantry”. Which is intentional because we aim to eat fresh as much as we can (but I do love a good box of mac & cheese. 🙂 ) That said, it was a pretty good lesson that I’ll never make everyone happy so I just need to keep doing what works for us and sharing it, along with the process so it can be adapted as needed by those with positive attitudes! Best of luck with your move, I know that’s a stressful time but I hope you come out of it in love with your new house and more organized than ever!
Andrea says
Love the food storage jars/containers. Can you tell me what brand you used?
Melissa George says
Hi Andrea, Sorry it’s taken me so long to reply! They’re the Better Home & Gardens brand from WalMart!
Deb says
Hello!
I was hoping you could provide me with the source you got your wall mounted hanging file holders? I have looked at a lot of places and have yet to find any and those are almost exactly what I have been looking for!
Thanks
Deb
Melissa George says
Hi Deb, they’re from IKEA! Here’s the link: https://www.ikea.com/us/en/p/kvissle-wall-magazine-rack-white-90198030/