As promised in the pantry reveal last week, I’m back to share all the goodies that didn’t fit in that post.
Last week was all about the pretty and this week is all about the purpose. I’ll be sharing details of the pantry organization, as well as the full source list.
No matter how many gold touches I added, at the end of the day, our NEED was an organized space that makes food easy to access. Before the makeover, stuff would get buried and expire, or we’d buy something only to find out we already had plenty. I was quite shocked to find that I had two brand new bags of sugar. Great if you are a baker, not so great for us.
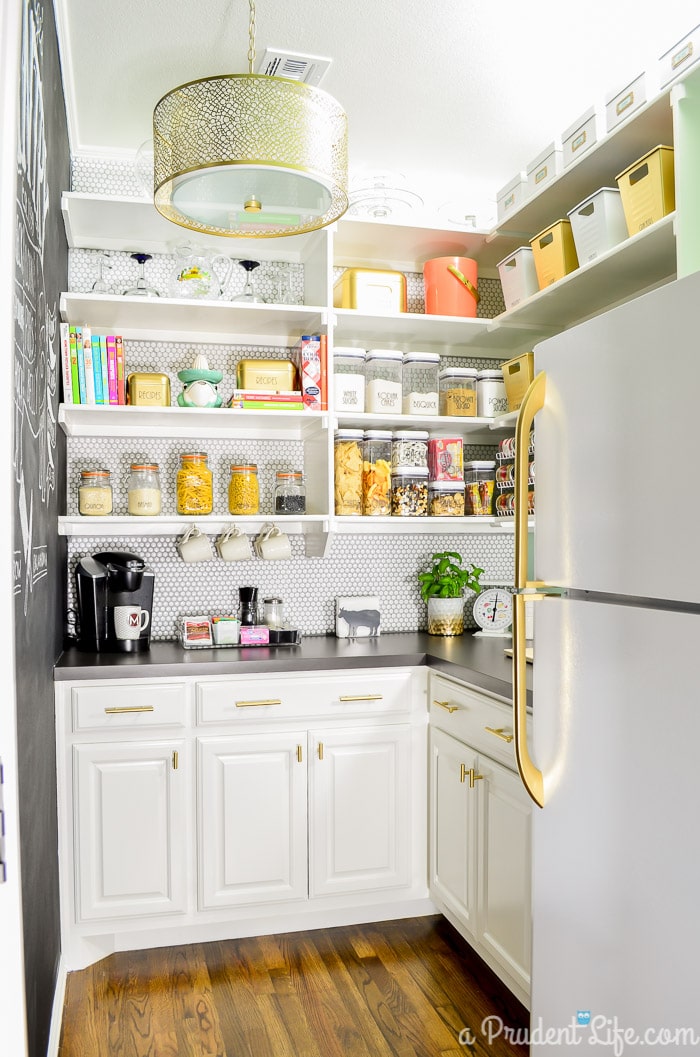
In case you missed it, here’s what the whole room looks like.
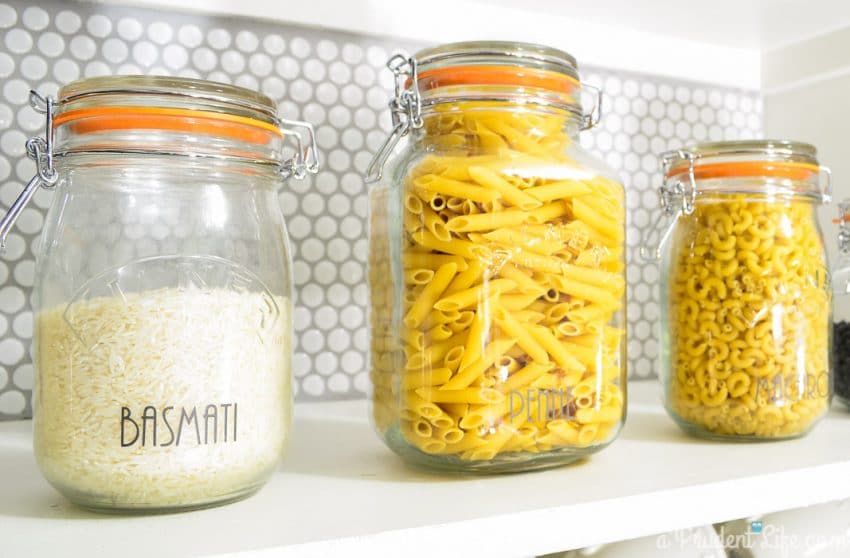
When I planned the back tile feature wall, I focused on using as many clear containers as I could in the organization. Luckily for the budget, we already had some glass jars that I could use for pasta, rice, and beans. I added new labels, because I just can’t have enough labels in my life.
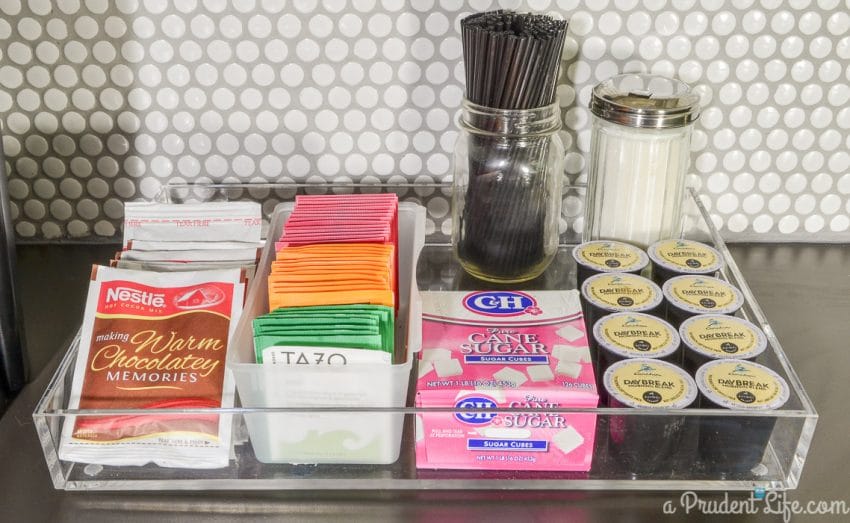
The coffee bar area uses one of my favorite organizing techniques – layering storage containers to sub-divide spaces. Putting the tea in a separate bin keeps it neat and creates a little section for the hot chocolate.
On the right side of the tile wall, I invested in some new storage containers.
Our previous snack area was a jumbo-sized basket, and we never really knew what was in it. When I cleaned out the pantry to start the makeover, I realized that the “vintage” in my vintage modern chic theme was nod to the age of the granola bars at the bottom of the basket.
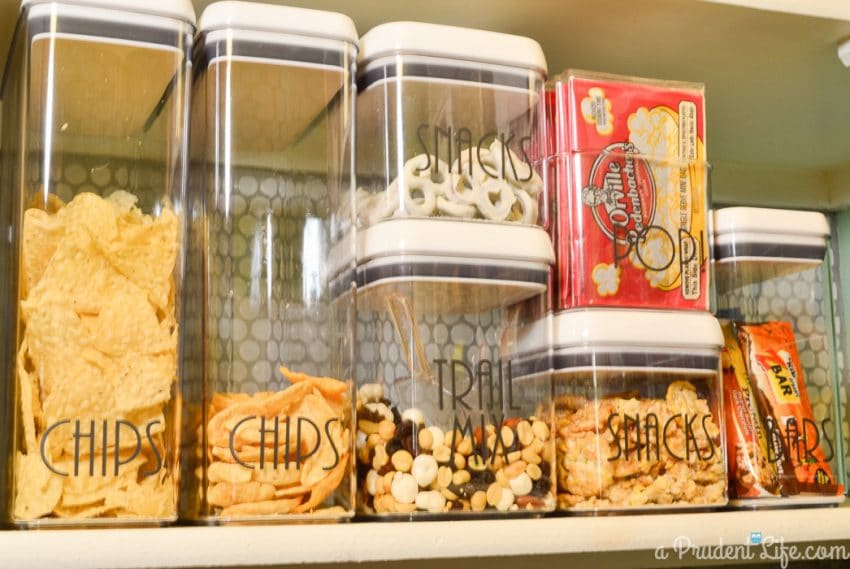
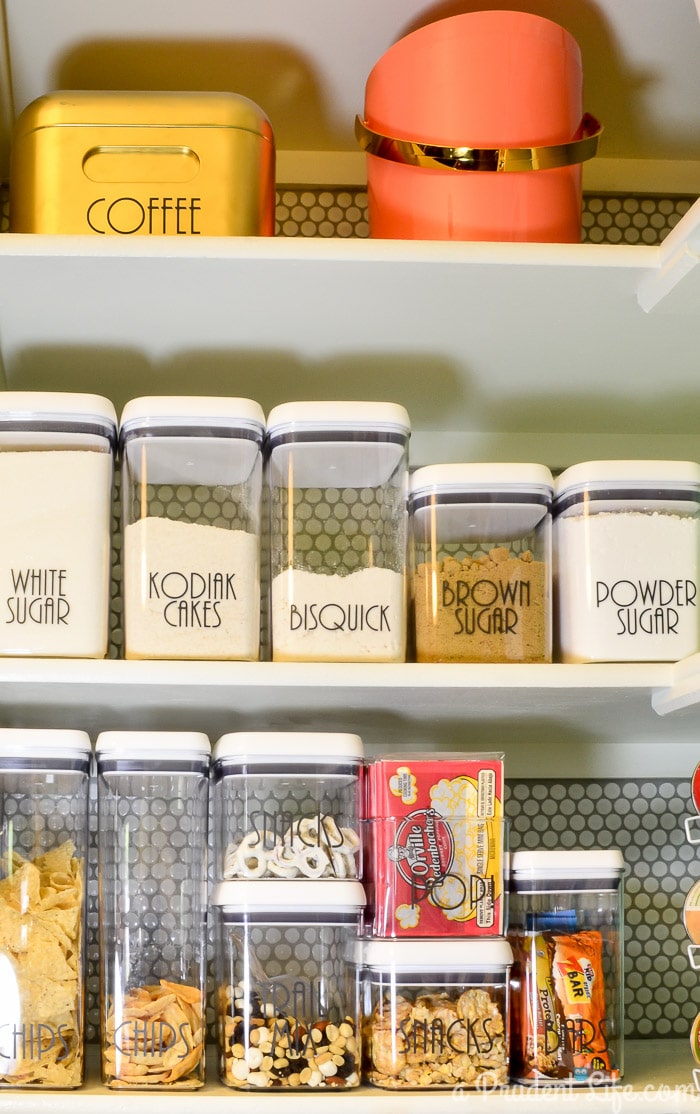
Now we have a dedicated (and airtight!) place for tortilla chips, lunch chips, trail mix, two snacks, popcorn, and bars. When it’s time to make the grocery list each week, I can see what we need to refill at one quick glance. We’re on a serious Sprouts yogurt covered pretzel kick at the moment, but I went with the generic “snacks” label so we can mix things up.
I picked up enough of the Flip-Tite containers to empty all of our baking related products into bins as well. The flour lives in the freezer, so I was left with sugar, Kodiak Cakes* mix (haven’t tried it? You NEED it – best waffles ever), Bisquick, brown sugar, & powdered sugar. As with the snacks, I can easily tell when we are running low. I’ve also got my fingers crossed that the brown sugar stays soft in the container…only time will tell.
I can’t tell you how much I love these Flip-Tite containers. They are the easiest thing ever to open and then reseal tightly. Best random find at WalMart EVER!
You may have also noticed the gold coffee container. I use that for all the K-Cups that don’t fit in the pretty tray. I stuck it up high because I’ll only need it once a week. The container itself was a super clearance find from IKEA – $2 total for the large AND smaller bins I labeled as recipe boxes. The large box is dented on the back, but no one can see it. For $2, I could live with the dent. They used to be green and I actually thought they’d match the wall, but the color wasn’t quite right. Nothing more gold paint couldn’t fix!
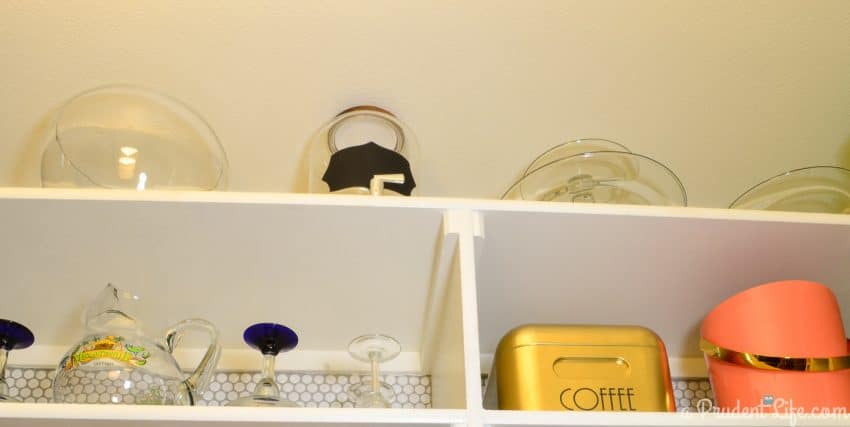
On the very top shelf of the tile wall, I realized I could store all my bulky, used just a couple times a year, serving pieces. I was able to display my punch bowl, drink dispenser, and tiered trays without totally blocking the view of the tile. Even better, I was able to get them out from under the cabinet, which makes tons of room for items we use more frequently. Double win. My margarita pitcher & glasses also found a new home in the pantry.
Going to the other wall now, it was time to save some money!
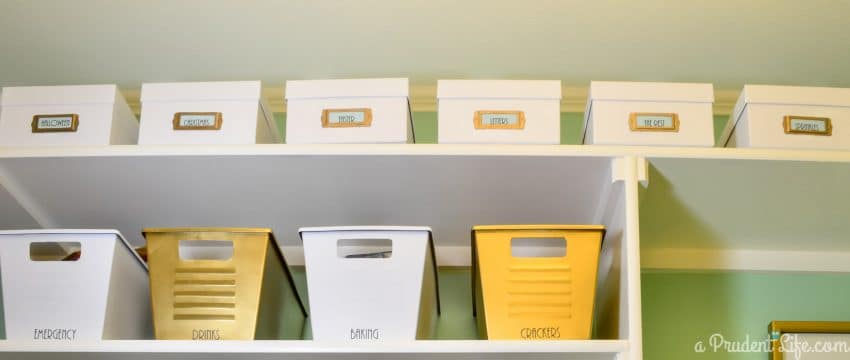
Along the very top, I used white photo boxes that I already had on hand. They are perfect to divide up my cookie cutters into holidays. Since I only make cookies 2 or 3 times a year, the million cutters and billion sprinkles had no reason to be in their previous prime location inside the lower cabinet.
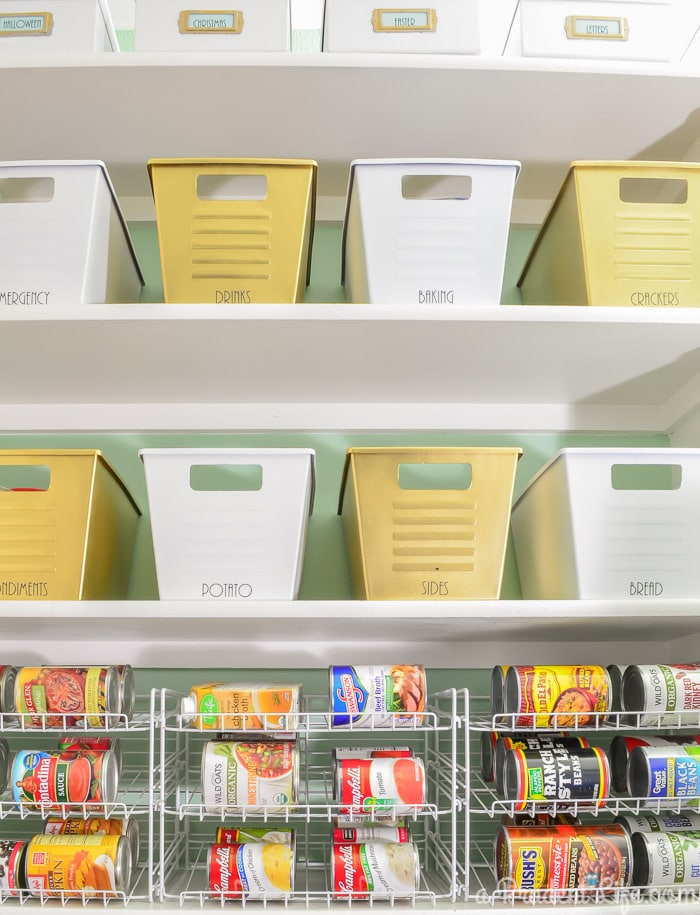
Below the photo boxes, I have two row of bins from Dollar Tree. They started out blue & purple. With a few coats of spray paint and more labels, the bins became pantry worthy. Using the same labels on all the various containers throughout the pantry really helped pull everything together.
The second shelf from the top was for the bins we’ll use less often, which ended up being:
Emergency – This is kind of a funny one. After I sorted through all of our food that needed to be divided into the bins, I was left with 2 rogue pouches of tuna fish. We don’t normally eat it, but it’s great to have on hand in case of power outages. I should have more on hand all the time, but I really need to stock up before winter. You can probably see in the pic above that something bigger than tuna is sticking out of the box. You see, I had a minor emergency. Popcorn Indiana Drizzlecorn was on sale last week. And my snack containers were already full. And I needed to take pantry pictures. EMERGENCY!!! And technically corn is a vegetable, which could be good in a disaster, right??? Seriously, I do need to fill the emergency container with legitimate stuff. We’ve been without power for days during ice storms and we need to be prepared.
Drinks – Wine-A-Rita mix, lemonade, etc
Baking – Baking soda, baking powder, chocolate chips, etc
Crackers – Like Ritz, which are awesome with Sprouts chicken salad OR with Nutella on top. Mmm.
The next row of bins are the things we use more often. I kinda need your help with a name for the first one! I went with condiments because we couldn’t think of anything else, but it isn’t exactly right.
Condiments – Peanut butter, Nutella, unopened mustard, pickles, etc
Potato – Potatos, onions, & garlic
Sides – The all important mac & cheese, random rice pouches
Bread – Bread & tortillas
The bottom shelf on the fridge wall was the perfect size to add some canned food shelves. I’ve got them organized into tomatoes, soups, and beans. We made taco soup (a variation of this) last night and it was SO much easier to go grab the cans I needed. Before, there would have been an archaeological dig to come up with the 6 different items I needed.
So now that you guys are all thinking I’m a pantry designing genius, I’ll fill you in on how things usually go. That taco soup we made? It was delicious and we had plenty left for tonight plus more to freeze. Happy day! Except that we forgot to put it in the fridge after it cooled last night. My husband noticed it still on the stove this morning.#bigfail #sosad So, all of you that asked if you could move into the pantry are welcome to it, as long as you remind us to put up the soup!
Source List (*affiliate links)
Paint
Shelf, Ceiling, Cabinet & Trim Paint – Benjamin Moore White Dove
Green Walls – Valspar Retro Green
Chalkboard Paint – Rust-Oleum Chalkboard Black*
Gold Accents – Rust-Oleum American Accents Metallic Gold
Organizing Bins
Coffee & Recipe Bins – IKEA SNIKA, spray painted gold
Pasta/Rice/Beans Jars – Kilner Jars* (We got ours years ago at Home Goods, but Amazon sells them)
Clear Coffee Supplies Tray – Target Room Essentials
Clear Containers (chip, snack, sugar, etc) – Flip-tite canisters* (Also sold at WalMart under BHG branding)
Can Organizers – WalMart Mainstays
Gold & White Bins – Dollar Tree (I painted)
Photo Boxes – Michael’s (watch for the sale – they sell them at 6 for $10 several times a year)
The Rest
Light Fixture – Lowe’s Portfolio (I painted)
Cabinet Hardware – Cosmas Euro Style T Bar Knob – 2″* & Cosmas Euro Style Bar Handle Pull – 5-3/8″ Overall Length*
( I painted, see painting hardware post)
Tile – I got mine at Lowes after quite a hunt (story here), but it’s gone from their website now. I found a Similar one on Amazon*.
Grout-MAPEI Silver
If I missed anything in the source list, ask in the comments or shoot me an email and I’d be happy to add it to the list! There are no words for how thankful I am for all of you that followed along with my One Room Challenge over the past almost two months. Your encouragement was a huge part of what made this space so great.
Now it’s time to see how we organized the kitchen! Head to that post next for more ideas.


Teri says
What a beautiful pantry. I. Just getting started on redoing mine and I love the chalk mural. Any tips on how I can recreate this in my pantry?
Melissa George says
Hi Teri, My husband designed it and drew it all from hand with chalk. Maybe ask someone artistic you know if they’d be interested in making you one?
Sherri says
Your pantry looks amazing. I have Tupperware cake & cupcake containers, 2 roasters, 9 x 13 cake pans & my electric skillet. etc. in my pantry. Where do other people store these items?
Melissa George says
You can get dividers so those cake & cupcake pans can stand on their sides. No more messy stacks! They work really well over the microwave or fridge in some kitchens. Something like these would be perfect: http://amzn.to/2jshSG9 (affiliate link) Although I just have my roaster and cake pans in a lower cabinet. There’s a picture of them in this post: http://www.polishedhabitat.com/2016/organize-cabinets/
Julie says
You have inspired me with your amazing pantry. I have a huge laundry room off the kitchen with one end as a pantry area. I have decided to use many of your ideas and posh up the space. I realize the post is a few years old but I was wondering where you got the frog juicer? It’s adorable and we love frogs! I have been having a blast reading your blog. So glad I found it!
Melissa George says
HI Julie, I love that you were inspired to get the pantry organized! The frog juicer was a gift from my awesome sister-in-law, probably 15 years ago. But, I found one for you listed on Etsy! I didn’t peak at the shipping cost, but it seemed like a great price on the juicer. Here’s the link: http://rstyle.me/n/cearmib5wxf (that’s my affiliate link so you pay the same price but I get a small commission). It was fun to find another frog like ours, I’ve never seen another one!
Sandra says
I love the way your pantry is organized by using clear containers with labels instead of random boxes. I do this in my minimalist kitchen, but my “labels” are just a magic marker that can be cleaned off with a bit of alcohol if I want to reuse a container. I found that by forgoing all manufactured food products I’ve got more room in the kitchen for my quinoa, rice, beans, lentils, rolled oats, masa flour, and other basic ingredients. It really helps with weight loss because if I want a snack, like tortilla chips, I have to make it from scratch–from mixing the masa, to rolling it out, and baking it into flavored chips while making homemade hummus. The pictures of snacks in your pantry seriously made me hungry so I’d better get busy.
Kellie Simpson says
OMG am I in love! I want the lot
Struggle with our “pantry’ and still don’t know how to tackle it. It’s a 2 door cupboard with 3 deep shelves and I’ve no idea how I can make it work for us. No matter what I’ve tried things still get lost and I end up having to move things to find what I need. Any tips??
PS gotta love me a label <3
Melissa George says
Ugh, deep shelves ARE hard, it’s not just you! The can organizers I have are great when you have duplicates of cans, lazy susan organizers are good to be able to rotate things around to the front, and I really love the tiered organizer I used under my bathroom sink ( https://www.polishedhabitat.com/bathroom-organization-sink-vanity-cabinet-side/ ). Other than that, grouping similar items together in deep but narrow baskets so you can pull the whole basket down at once as needed might be a good bet. Labeled of course. 🙂
Charlene says
What font style are these labels? I tried the link for your Etsy site, but it says it’s unavailable. Any suggestions?
Melissa George says
Hi Charlene, The font is called AR Bonnie. I closed the Etsy shop because I didn’t have time to keep up with it and must have missed taking out that link. If you happen to have or know someone who has a Cricut Explore or Maker, I do have a tutorial for making them here: https://www.polishedhabitat.com/organizing-with-cricut-maker/
Gavriella says
Hello!
Beautiful kitchen! Where did you get the good fridge/freezer handles? I’ve been looking for handles exactly like this!
Melissa George says
Thank you Gavriella. I actually spraypainted the old ugly white handles! They are easy to remove with just a screwdriver since the fridge was made for the doors to be reversible. After a good cleaning, I used Rustoleum paint and it’s held up really well. It was about 3 years the first time and then I just touched them up for the first time because I was taking photos for an upcoming book and they needed a spruce up. It was a bit of a risk, but I knew worst-case scenario, I could buy new white ones. The risk totally paid off though!