Have an IKEA Poang Chair but wish it had a more stylish cover? This tutorial will show you how to make a DIY IKEA chair cover from any fabric.
I’ve got another great guest poster this week! The sisters that make up Sypsie Designs are some of the best frugal DIYer’s I have seen. Every post, I’m impressed with their creativity and money saving tips. Over the past few months, we’ve bonded over a shared obsession with Target clearance finds and pretty much everything at Marshall’s.
Hi Polished Habitat readers! I’m Jodie and I run Sypsie Designs along with my sister, Paige, where we share all about our home décor ideas and furniture makeovers, big and small. We’re so excited to be here and share with you today!
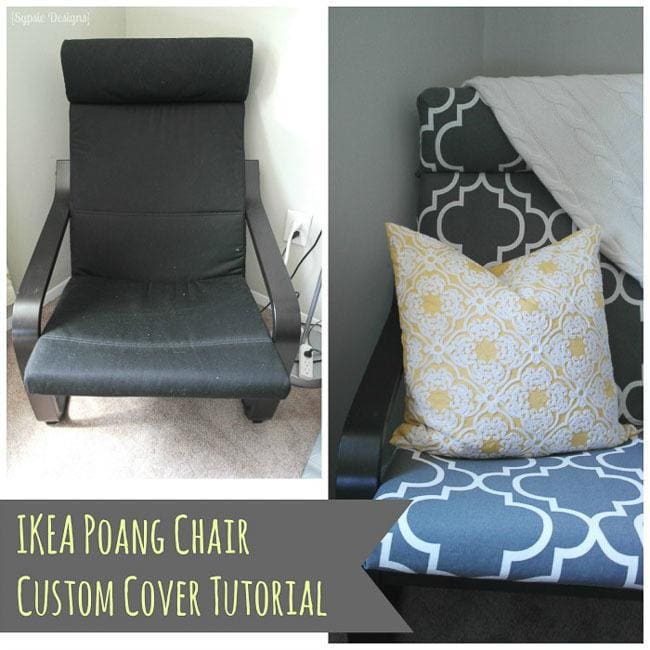
I recently moved into a one bedroom apartment with my guy, and have been working to update our space as frugally as possible- which means altering quite a few plain-jane IKEA furniture pieces to give them a bit of personality. Today I’m sharing how we made a custom cover for an IKEA staple, the Poang chair! Do you have one? I bet at least a few of you have your hands raised- they’re everywhere! They’re very practical, but I wanted something more fun than a plain black cover for our space.
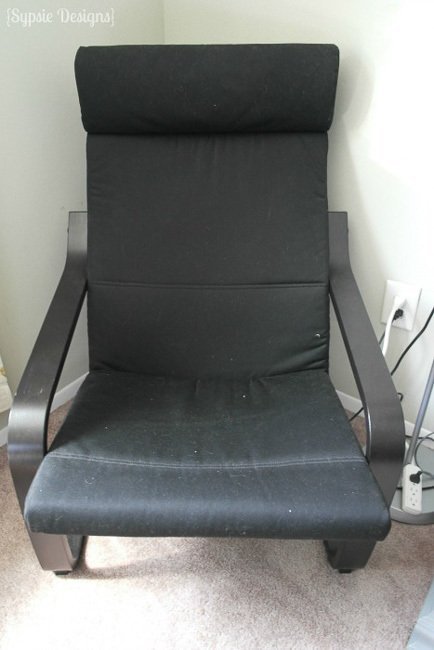
It’s also useful at collecting fuzz and dust as you can tell. Not so pretty. To make the new cover, all that’s needed is a fabric shower curtain and a sewing machine. Don’t worry- it’s only 6 straight lines, and could even be completed with iron on hem if you’re not friends with any machines.
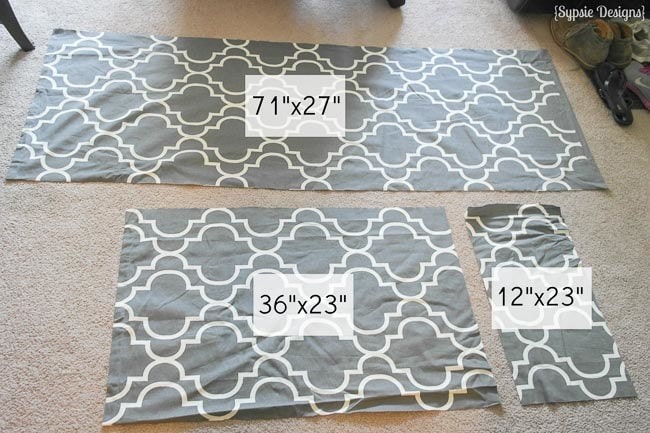
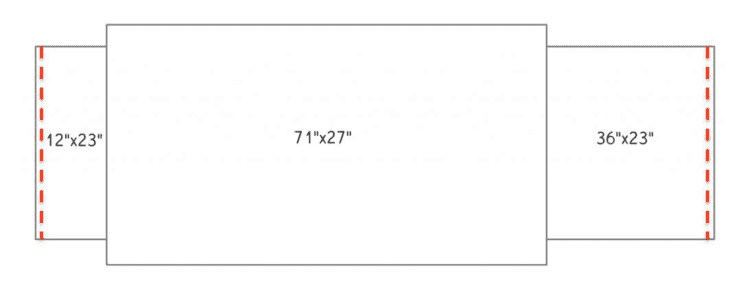
You will need three pieces of fabric- 71”x27”, 36”x23” and 12”x23”. My only tip here is to make sure that your pattern is centered when you cut out the pieces, especially on the 71”x27” piece for the front!
DIY IKEA Poang Chair Cover
First, start off by sewing the three pieces together like so (on the red lines), making sure to sew the right sides together. They’re not the same widths, so just make sure to center the pieces.
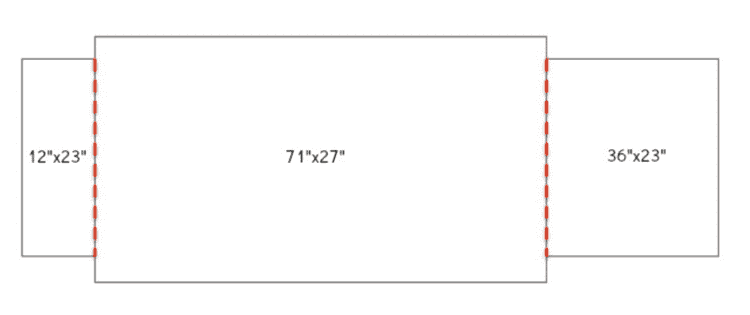
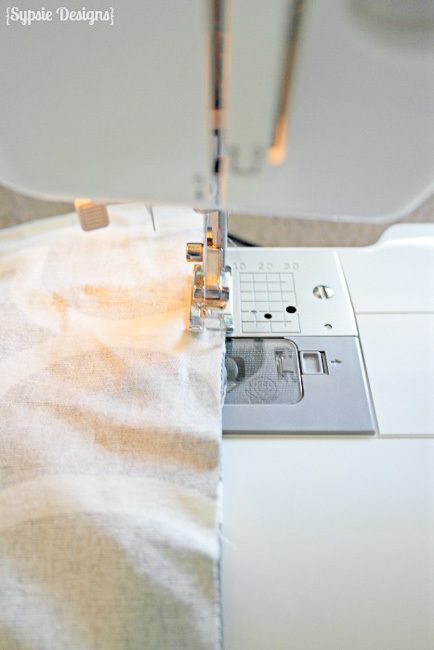
Next, hem both ends by folding over the fabric 1/2″ and sewing in a straight line on the red lines shown.
Four lines, down, two to go.
Next, with the fabric lying right side up, fold the longer piece (36” long side) over, 10” past the edge. Then, fold the shorter piece over (12” long side) over, 3” past the edge.
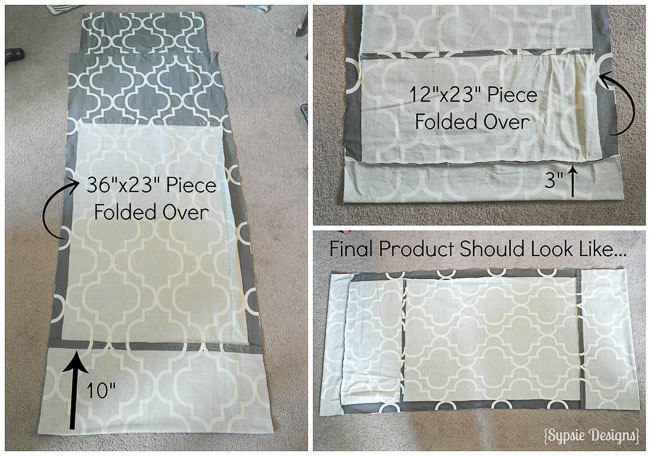
As you can see we’re essentially creating a simple envelope pillow cover for the cushion, but this version leaves you with no visible seams. They will all be hidden behind the chair and under the seat, so even if you mess up a bit no one will be able to tell- my kind of project : )
Next is the most complicated “looking” part, but it’s pretty simple. It’s time to pin. Only two more straight lines of sewing left!
Start in the middle of one of the sides, and pin the edges together. The easiest way (since the fabric does not line up perfectly) is to pinch the fabric together and pin as you go. When you get to the ends, just keep the line the same, leaving about a 2 inch excess on the top piece.
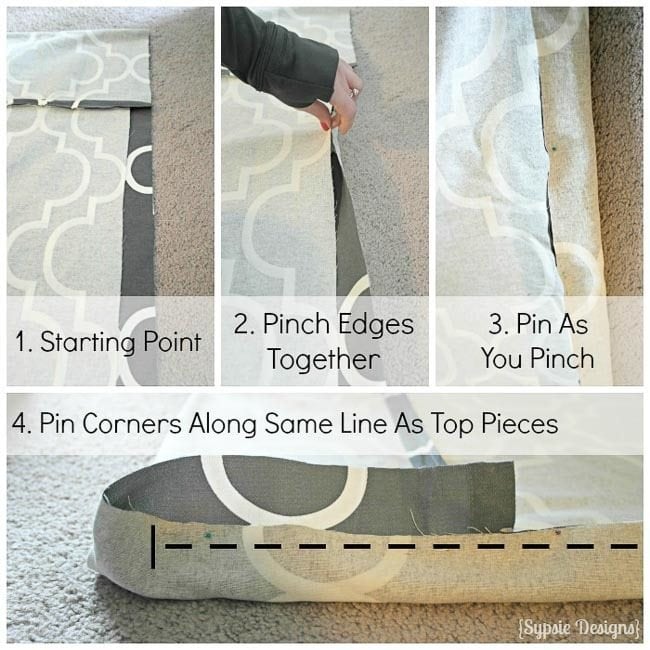
After both sides are pinned, it’s time to sew the last two lines! Start about an inch from the end, and end about an inch before hitting the end of the fabric as well (see the black dashed line on the pic above for reference.) The corners can be tucked in after you’re done, allowing for that seamless look.
Flip that baby right-side out, and you’re ready to stuff in the seat cushion! We left the original IKEA black cover on to keep the cushion on one piece- keeping the cushions where they’re supposed to be (there’s 3 separate cushions involved if you take them out.) The envelope opening will go under the seat cushion and out of sight. After you’ve put the cushion back on the chair, simply tuck the fabric into the two creases at the back of the seat and head cushion.
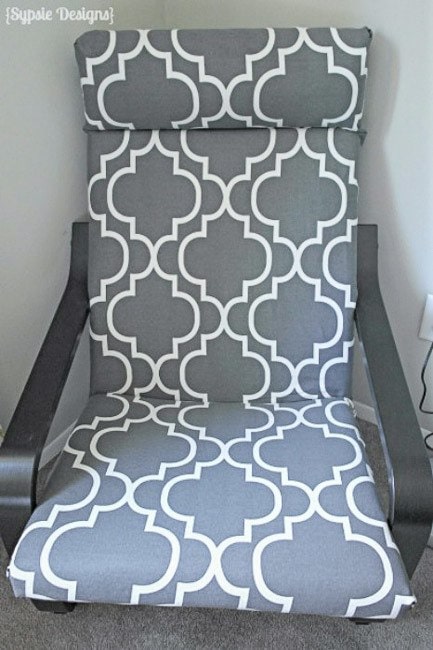
SAMSUNG CSC
Fabric shower curtains are our favorite material to work with when reupholstering or working on small projects, since they can be found at stores like Marshalls for around $15 a pop! That’s very inexpensive considering the cost of that much fabric at a craft store, and all of the projects we’ve used them for have held up great so far!
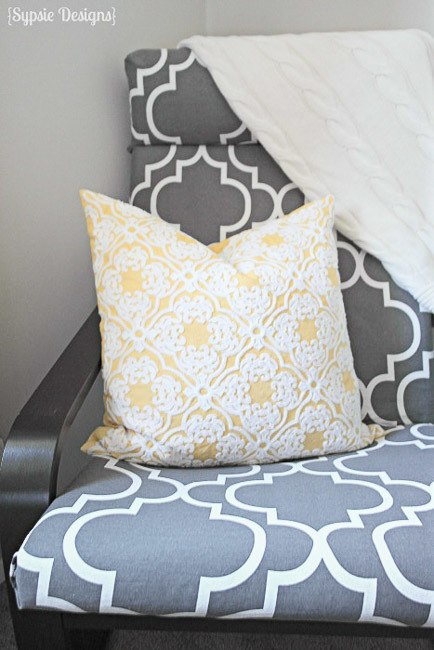
I hope you’re inspired to personalize your own chair in a thrifty and unique way! Projects like this are great because you can change out the cover as often as you’d like, and you’re not stuck to one certain (or expensive) design choice. Especially if you change things up as often as we do : )

Antoinette says
I just finished my chair cover from your instructions. The instructions on pinning the last pieces were wicked confusing! I ended up leaving it open and hand sticking it once I had the cover on the chair to finish it. I also ended up with too much fabric on the top because mine doesn’t have a headrest. It would have been helpful also to include how much yardage would be needed if not using a shower curtain. Overall, I have a lovely finished piece and enough fabric to cover my ottoman cushion so I am happy. Thank you.
Melissa George says
I’m so glad you were able to figure it out and finish up your project! Sorry for the confusion. The post was written back in 2014 by another blogger and I don’t sew myself so I haven’t been able to recreate it to update the photos and clarify questions. I’ve thought about removing it, but then enough people have told me they love their covers that I also don’t want to remove the resource. Sorry again that it was trickier than it should have been!